Do these 5 things when you get your Google Pixel

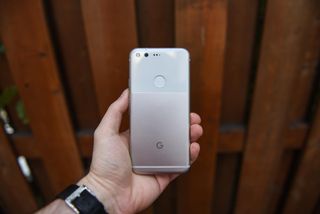
You've done your research, you've read the review and you've placed your order. Now your fresh new Google Pixel or Pixel XL is awaiting your setup and customization. Just like any new phone there's a lot to take in with the Pixels, and we're here to point you in the right direction so you can start things off the right way.
Here are the first things you should do with your new Google Pixel.
Add your fingerprints

If you took your time during the setup process you likely went ahead and enrolled a fingerprint for Pixel Imprint, but before you get too far into setting up your new phone you should enroll your other index finger as well. Head into the Settings, tap on Security and then tap Pixel Imprint to enroll your other finger.
Considering the placement of the sensor on the back of the phone you probably won't want to enroll anything other than your index fingers, but having both sent up from the start means never having to worry about it again. It's simple, secure and takes only a few seconds to add both fingers.
Arrange your quick settings
Android Nougat's notification shade quick settings can be arranged in whatever order works for you, and it only takes a minute to get set up. Pull down your notification shade, swipe a second time to reveal the full set of toggles, then tap the pencil icon at the top of the notification shade to edit them.
Tiles in the top black portion of the shade are active while those lower down in the grey area are inactive. Press and hold the tiles to move them around to whatever order you like. The first nine toggles you put in the quick settings show up on the main page, and additional toggles you add go to a second page that are just a swipe away. The top six toggles are available to be tapped at any time with a single swipe down of the notification shade, so choose the group and ordering wisely!
Configure Google Assistant

Getting started with Google Assistant is also part of the general setup process of the phone, but there's plenty more to configure after you've made it to the phone. To configure Google Assistant, press and hold the home button, then tap on the overflow menu button in the top-right corner of the Assistant interface and tap Settings.
Be an expert in 5 minutes
Get the latest news from Android Central, your trusted companion in the world of Android
Not only can you do the basics like turning on/off the Assistant and choosing which Google Account to use, but you can also configure the "OK Google" detection to train it to your voice, choose which news sources are included in the narrated news ticker, and manage input and output languages. You can also see your recent activity with Google Assistant, and configure the personal information that Assistant has access to.
Though Google Assistant is smart, going through a bit of setup to give it a head start absolutely helps you get the best possible experience out of this new feature.
Using Verizon? Check your network settings
If you bought your Pixel unlocked and put a Verizon SIM in it, everything should work out of the box. But chances are you can make a couple tweaks to the network settings to make it work at tip-top performance. First, open up your Settings, tap on More under Wireless & networks and then tap on Wi-Fi Calling to configure the feature. You'll have to accept some terms and provide your E-911 address, but then you'll be able to make Wi-Fi calls. Unfortunately you won't have any further configuration options, but WI-Fi calling will be enabled and ready to go.
Going a step further, tap on Cellular networks to make sure that "Advanced Calling" features are turned on. This will make sure that your Pixel connects to VoLTE for HD Voice calls and simultaneous voice and data. Finally, tap on Preferred network type and switch it over to the simple "LTE / CDMA" for local use. If you plan on traveling abroad the phone will automatically switch back to "Global" mode to use other networks, but when you're in the U.S. you'll want to keep things on the standard LTE/CDMA mode.
Get the camera interface set up just right

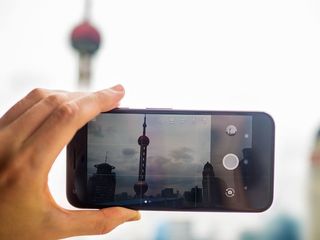
The Pixel has a pretty simple camera interface, but out of the box there are a few configuration options you can hit from the start so you don't have to fumble with them later while you're trying to take a time-sensitive photo. When you open up the camera, in the top-right corner of the viewfinder you'll see an option for grid lines in the middle of the five icons — consider turning on the grid to help you line up your shots perfectly. While you're there, tap the flash icon on the right to turn off auto flashing — nobody needs that.
After that, tap the menu button on the lefthand side and tap into the settings for some more advanced options. If you take panoramas, tap the Panorama resolution settings to set it to "High" for the best quality. Then tap on Back camera video resolution to up things to 4K if you want the highest resolution possible, and double check that "Video stabilization" is also turned on for the smoothest shots.
Finally, if you want to save the location of photos and videos for future searching and remembering exactly where your best shots were taken, you can turn that on at the very top of the settings — you'll have to approve the permission from the system when you do so.
Join the forums!
As you'd expect, you're definitely not the only one who got a Pixel or Pixel XL in the mail. Thousands of Android Central members are going through the experience of setting up their Pixels right now as well, and the AC forums are the place to go whether you want to share your experience or get help with a question.
This post was originally published in October, 2016. It was recently updated in November 2016 with some updated information.
Andrew was an Executive Editor, U.S. at Android Central between 2012 and 2020.

