Using Gmail as your own personal push mail server
One of the biggest complaints from those migrating over from a Blackberry to an Android device has got to be e-mail. We get used to doing things a certain way, and feel lost when things change. Even if you’re not used to Blackberry’s push mail this is a great method to not only get things more organized, but save some battery as well. Join us after the break!
Before we begin, lets talk a bit about push and pull e-mail. On your computer, you’re pulling e-mail. You’ve set up Outlook, Thunderbird, or any other e-mail program to check for new mail every x number of minutes. This can be done on your Android device as well by following the Setup Wizard for the mail application. This works great, and is easy to set up. It also uses more battery power. If you’re like me, you use the heck out of your Android phone, and anything to help save battery is a good thing. That’s where push e-mail comes in. Did you notice that you never had to enter a time to check message through your Gmail account on your phone? That’s because Google pushes all Gmail to you. When a new message appears in your Gmail inbox, you get notified automatically, just like when a text message is received. We’re going to exploit that so Google checks your POP e-mail accounts, then sends you a notification when it gets one. That way you no longer have to check for new mail every X number of minutes, and it saves your battery!
This nifty trick will work for any POP e-mail account, except for Yahoo. Yahoo has decided that they will charge a yearly fee to use POP forwarding. If you are tied to a Yahoo e-mail account and decide you want to pay the fee, then this works for Yahoo e-mail accounts as well.
To set up for this I’ve created a dummy POP account through my ISP (Comcast), and a dummy Gmail account. Substitute YOUR pop account and Gmail account for my information of course. (Unless you want even more crazy pharmaceutical offers or letters from Nigerian Princes :) )
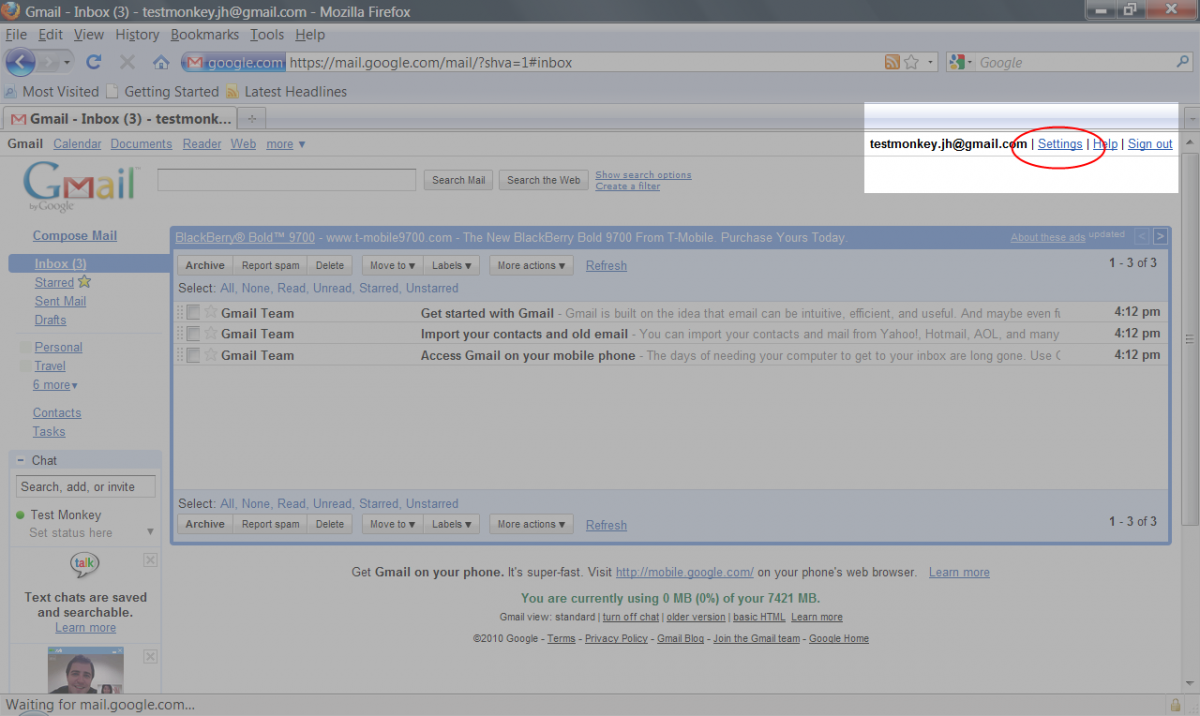
Most of this work will be done on your computer. If you don’t have a home computer, it can easily be done at the library or at a friends house. Fire up your Internet browser and head on over to Gmail. Sign in, and look for the settings link in the upper left. I’ve highlighted it in the image below, which you can click to enlarge.
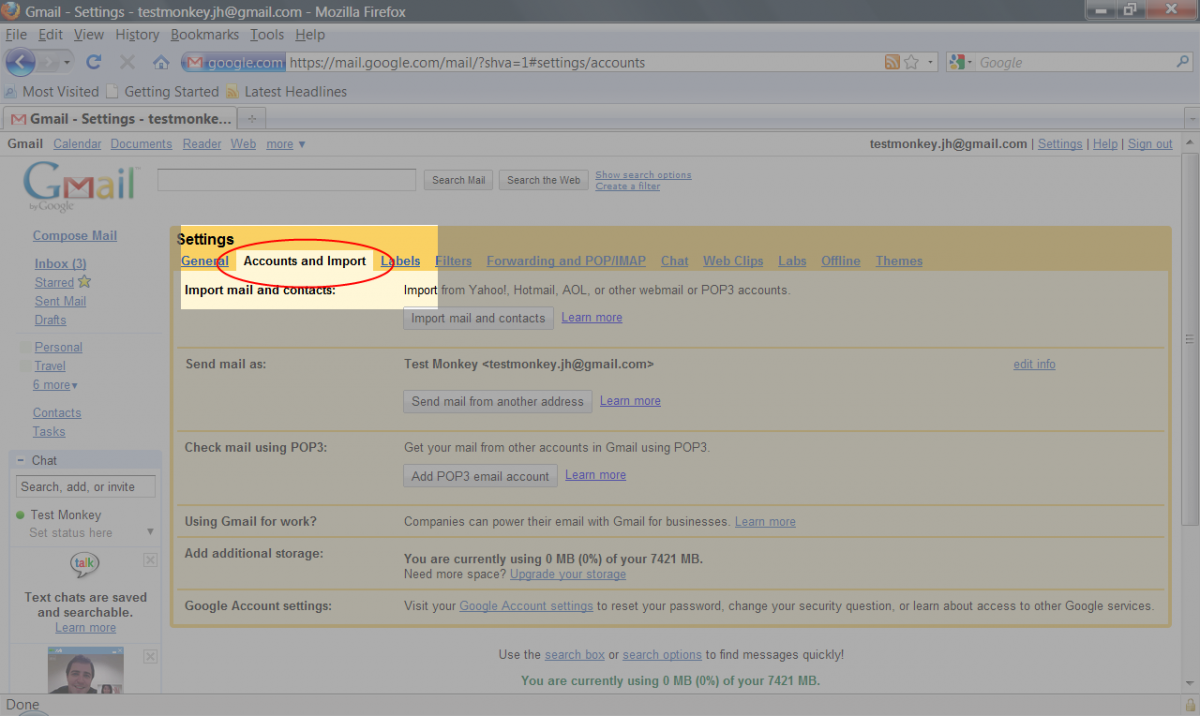
Go ahead and click the link. It will open the settings area for your Gmail account. We’re interested in the Accounts and Import tab. Once again, I’ve highlighted it below, and you can click to enlarge the image.
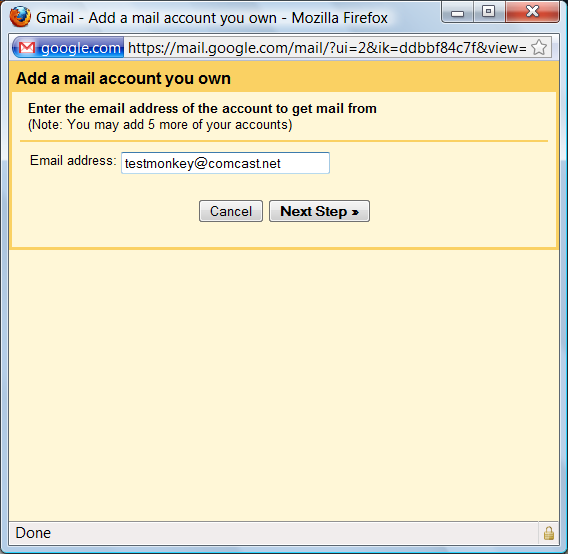
Once you have it open, look for the button that says “Add POP3 e-mail account”. It’s the third button from the top and in the section titled “Check mail using POP3”. Click it and you’ll get a small window that looks like the one below.
Get the latest news from Android Central, your trusted companion in the world of Android
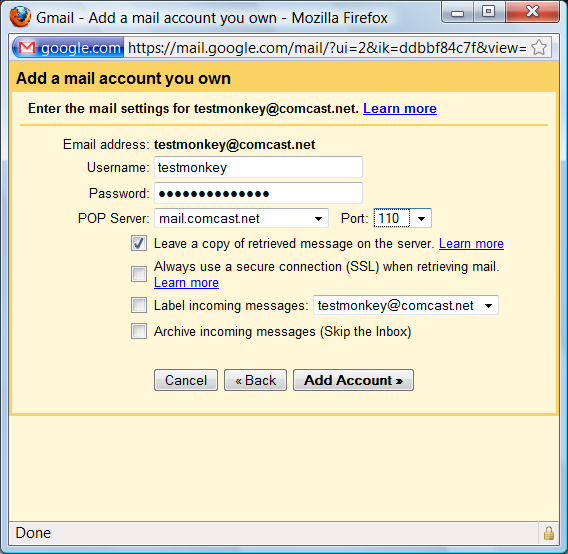
In the input box, you’re going to want to enter the e-mail address you would like Gmail to check for you. In the example, it’s testmonkey@comcast.net. Substitute that with YOUR e-mail address, then click the Next Step button. The window will change, looking very much like the example below.
Let me explain the settings here a bit.
The Username field will be the User name of the POP account. In our example, it’s testmonkey. Normally, the part of your e-mail address before the “@” sign will be your username.
The Password field is the password you use to check the POP account. Type it in exactly the same as you would if you were checking mail.
The POP Server field is the internet address of the POP mail server. This information is the same as if you were setting up a mail account on your computer. If your unsure, a quick glance at the “help” section of the website that hosts your POP mail account should tell you. Usually it will be mail. or pop. (don’t forget the dots!) then followed by the portion of your e-mail address that’s after the “@” sign.
The Port field is the port the POP mail server uses to listen for incoming requests. This information can also be found from your POP mail servers “help” pages. If in doubt, set it at 110. This works for the vast majority of POP mail servers.
Leave a copy of retrieved message on the server. In our example, that’s checked. If you leave it unchecked, the mail will be deleted from your POP e-mail account once Gmail gets it’s copy. I like to leave them available so I can also check my mail from a laptop or even another phone. Warning - if you leave this box unchecked, you’ll be unable to get the mail from this account anywhere besides your Gmail account!
Always use a secure connection (SSL) when retrieving mail. If your POP mail server requires you use SSL to check your mail, check this box. If unsure, leave it unchecked. In either case, if you choose the wrong setting Gmail will tell you when you click the Add Account button and you can change it.
Label incoming messages. Check this one, and choose the label of the account. In our example it’s left unchecked (see everyone makes mistakes!), but you’ll want to check this one.
Archive incoming messages (Skip the inbox). Checking this will keep the mail collected off your POP account from appearing in your Gmail inbox. It will still show as unread, but won’t be mixed in with any mail sent to you@gmail.com. You’ll still be able to read it through the label settings (more on that later), so this is personal choice. I like all my mail to get lumped together in one inbox as well as having the separate inboxes, so I left it unchecked.
Once you have things set up, go ahead and hit the Add Account button. You’ll be sent to the next screen, which you can preview below.
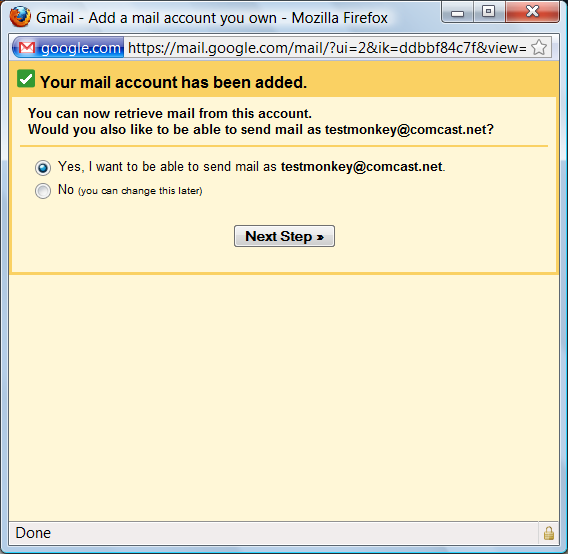
Here you need to make a choice. When you get a message (in our case) to testmonkey@comcast.net and decide to reply to it, which account do you want the reply to be from? If you choose Yes, I want to be able to send mail as testmonkey@comcast.net any replies to mail sent to testmonkey@comcast.net will show that e-mail address as the sender. If you choose No, replies will appear to be coming from you@gmail.com. This is a matter of personal preference, but for this tutorial we want to send mail from the same address it was received, so we’re saying yes. After you decide, click the Next Step button. You’ll see the next window, just like the one below. Note that if you decide to choose No above, you can skip through until the rest of us catch up.
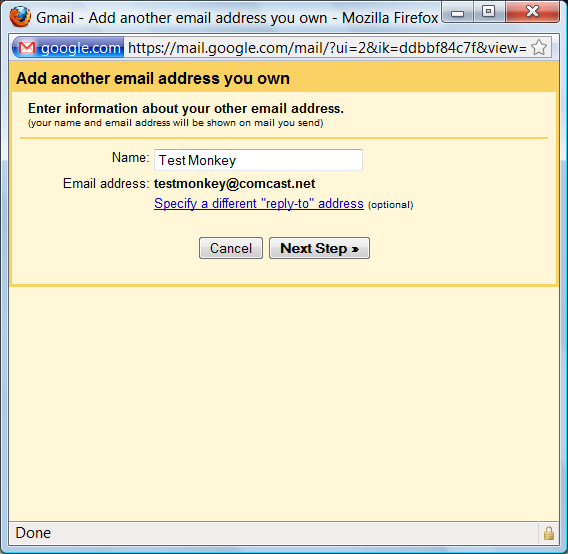
The Name field is the name you want the mail to be sent from. Use your name, not Test Monkey :). The link to Specify a different “reply-to” address is beyond the scope of this article and used when you are collecting multiple accounts and want to reply from an account other than the one that received the message. The folks who need this already know how to set it up. For the rest of us, just hit the Next Step button and see the next window.
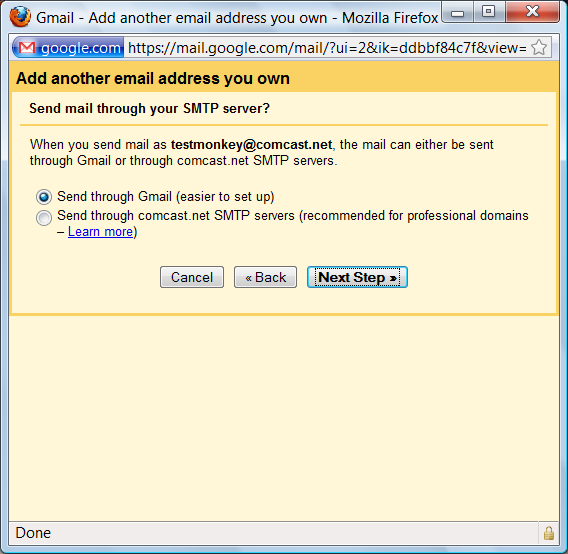
This is another of those settings for advanced users. For our purposes we want to use Gmail’s outgoing servers to send our mail. Make sure you have the Send through Gmail button chosen, and hit the Next Step button to move forward.
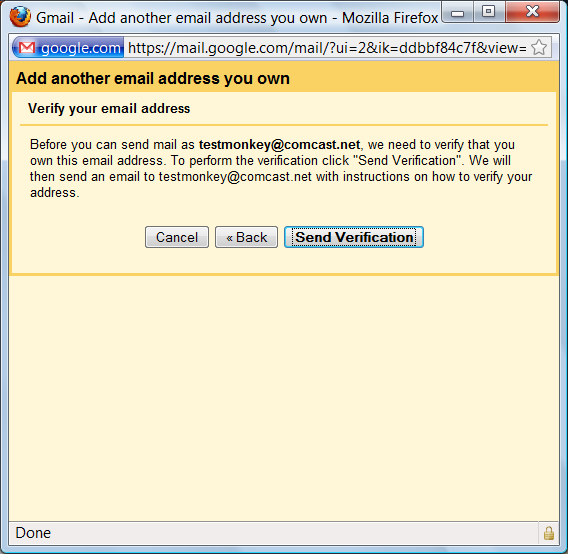
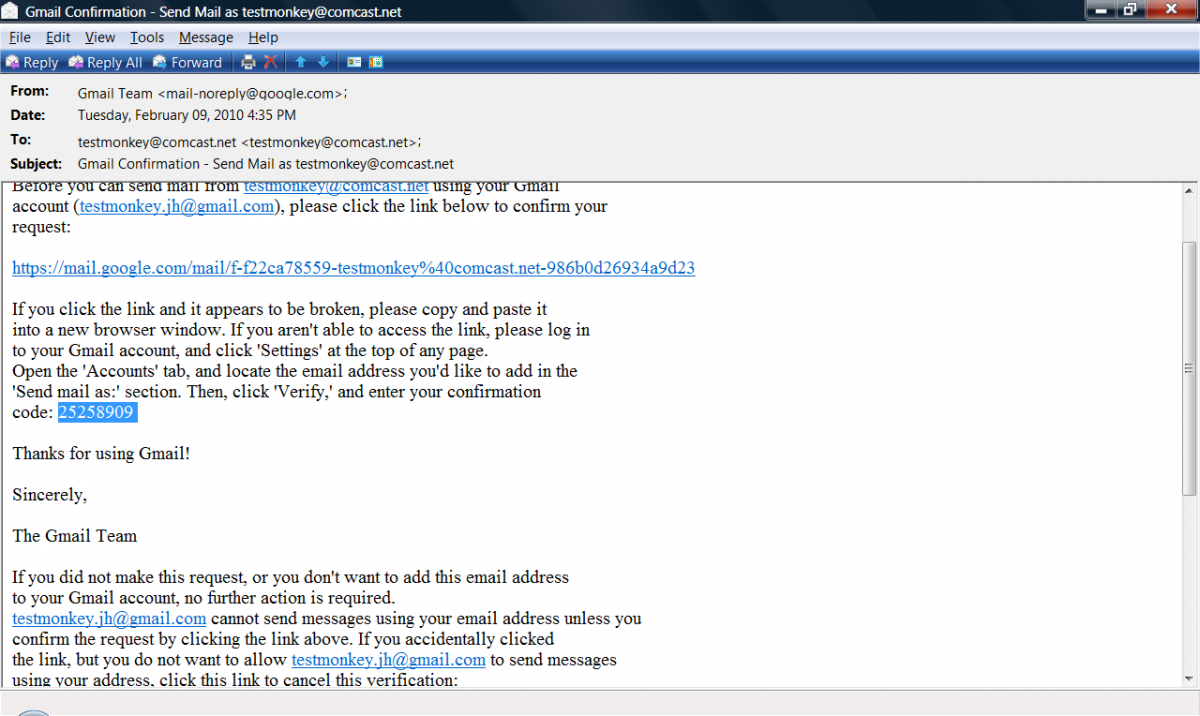
You wouldn’t like it if I used your e-mail address as a reply-to when I send an e-mail to my son at school complaining about the latest increase in his car insurance. Google thought of this and makes you verify the account before setting it up. Click the Send Verification button to move forward. At this point, we need to check the e-mail account we’re trying to use with Gmail. DON’T CLOSE THE BROWSER WINDOWS THAT YOU HAVE OPEN. You need to come back and enter the code after you’ve received it in your POP mailbox. Open your POP e-mail and check for a new message from the Gmail Team. Open it.
Above I’ve highlighted the code you need to enter back in your Gmail account. You’re also given the opportunity to click a link to authorize it, but since we’re not quite done in Gmail we will just enter the code manually. (Note - for those that like to do things they shouldn’t, these example accounts are already deleted so trying to use this info won’t do you much good ). Copy down the code and head back to the Gmail window.
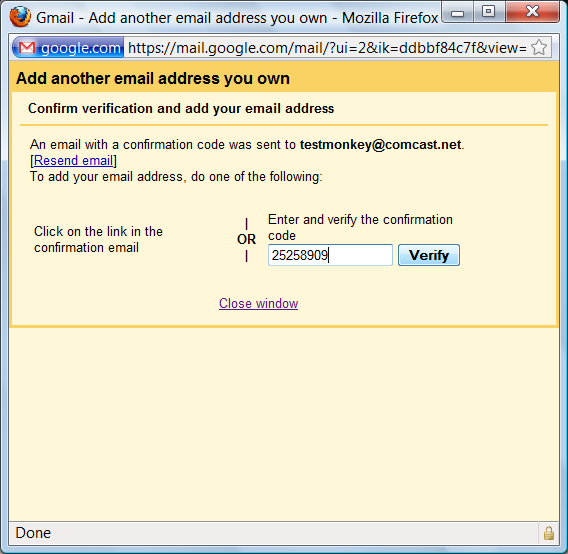
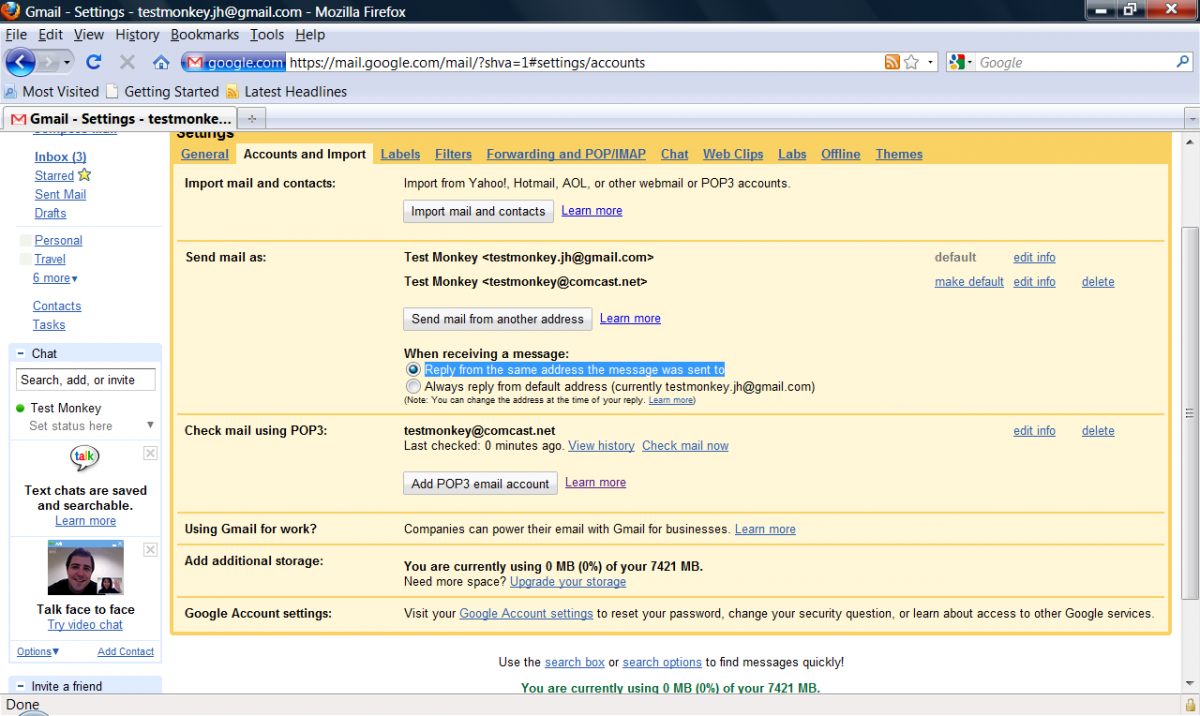
Place YOUR code in the box (don’t use the example, every code is different) and click Verify. The window will close, and you’ll be back to the settings for your e-mail account. Click the image below to check out our example
Make sure you have The highlighted section in our example marked in your settings. From now on, Gmail will regularly check the POP account you’ve just set up and forward the messages to your phone. We’re not done though, as we are going to set up special inboxes on our device to separate things. If you would prefer everything go into a central inbox, you can skip this part.
Find a nice empty spot on your home screen, and give it a long press. You’ll get a dialog pop up that looks something like the one below. Note that mine may look different, as I’m using a device with HTC Sense , so don’t be alarmed that yours isn’t black.
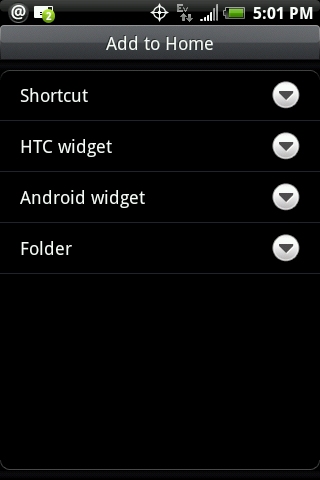
Press the Shortcut selection, and you’ll see something close to the image below.
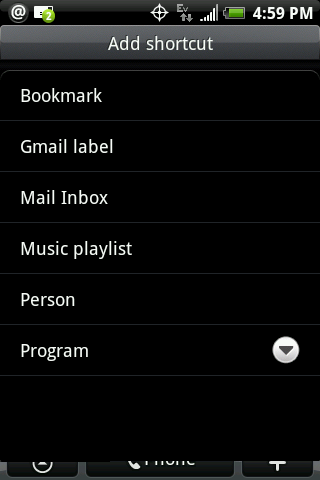
We want to choose Gmail label. This will open your phone’s Gmail app to choose the label you want to display. We’re going to choose “Comcast”, but you choose the one you just set up.
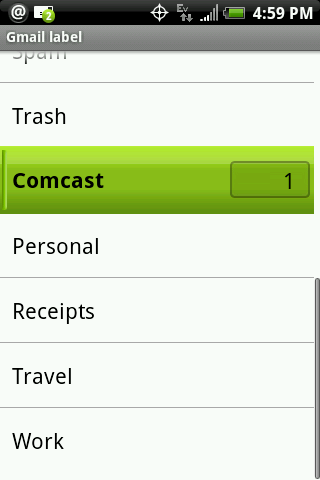
Go ahead and press the name of the label you want to show, and the window will disappear and you’ll be back at your desktop. You’ll have a shortcut directly to mail with that label on your desktop as shown below.
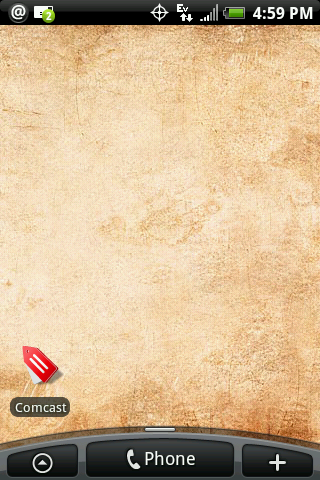
Once again, your icon may look different depending on which version of the Android operating system you’re using. Our example is using Cupcake. Now if you click the new icon, you’ll be brought to your Gmail app, but you’ll only see mail that came in to your POP account. We have another pic below to check out our example.

Since I didn’t tell Gmail to bypass the inbox, I also have a label for the inbox there. If you didn’t choose to combine them, you won’t have one. You can add shortcuts to as many labels as you like. Here’s an image of a few in action
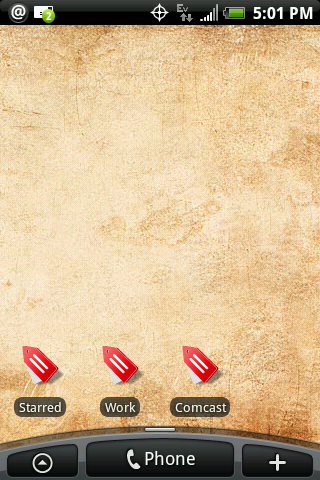
But wait! We’re not done yet. Having labels and inboxes is nice, but what if we don’t want to take up so much space? Why put them in a folder of course! Long press a blank area of the home screen again, but this time choose Folder. You'll see the screen change to resemble the example below.
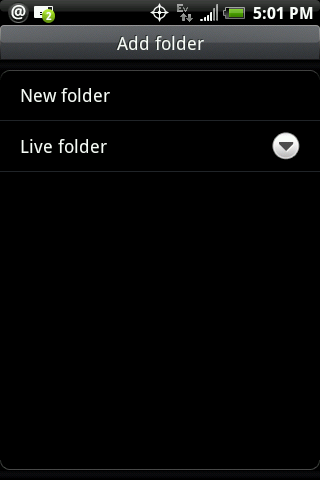
We want to pick New folder, so press it. The window will close, and you’ll be back at the desktop with a new icon. Oddly enough it’s named “Folder”.
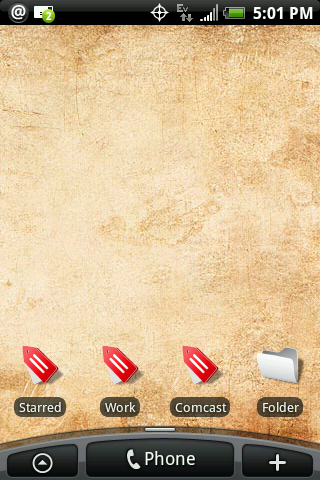
Well of course that won’t work. Lets change it’s name. Press the folder icon to open it. A blank window will open, similar to the image below.
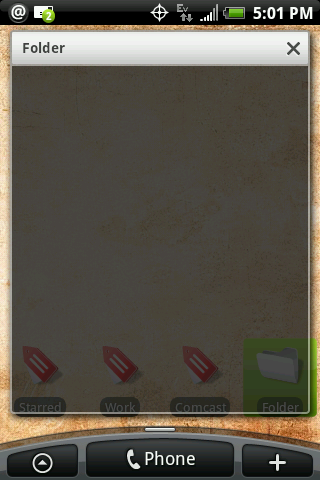
Notice the title bar of the window is named Folder as well. To change it, click the title bar of the window. A new window will open that lets us set the name as we would like it. In our example, we’re going to name it Mailboxes
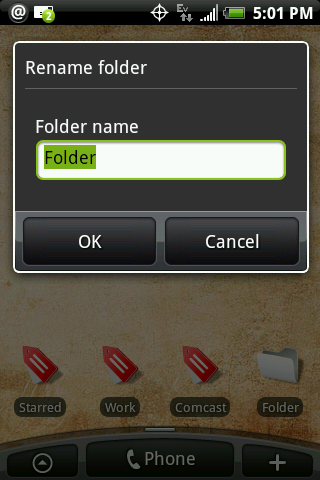
Hit OK and you’ll be dumped back to the desktop. Notice that the name of the folder has changed. Now long press on one of your e-mail labels, and drag it over to the Mailboxes folder after it becomes movable.
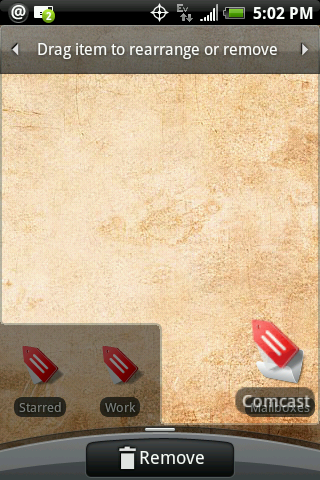
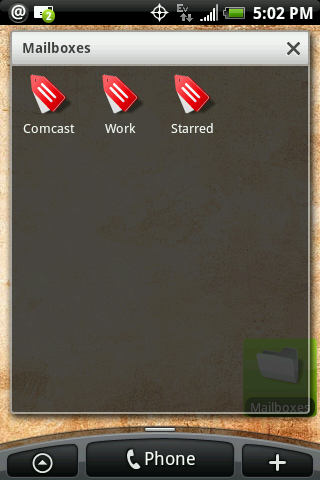
Once you’re over the Mailboxes folder, let go. The Gmail icon will dissapear, but don’t worry. It’s now nested inside the folder. You can move all your mail labels into the folder. Now hit the folder icon again and look inside.
Now try it out. Open your Gmail application and send a new e-mail to the account you just set up. Give it a few minutes, and when you get the new mail indicator, click the label you just created and you’ll see it sitting there waiting for you.
This trick can be done with as many POP e-mail accounts as you would like. I use it to check and deliver my mail from three other accounts. When you add up the power savings from not having to check and pull from three other accounts every 15 minutes, it gets to be fairly significant. You do need to know that this doesn't make the mail delivery instant. Gmail checks your POP accounts on a set schedule of 15 minutes or so. Once it hits Google's mail server, it's pushed directly to you.
I hope you found this as helpful as I do, and that you enjoyed this weeks Inside Android. Now get working and solve those e-mail woes for good!

Jerry is an amateur woodworker and struggling shade tree mechanic. There's nothing he can't take apart, but many things he can't reassemble. You'll find him writing and speaking his loud opinion on Android Central and occasionally on Threads.
