
Nearly three years after its 2020 launch, the Meta Quest 2 is still going strong. Originally called the Oculus Quest 2, this wireless VR headset has added tons of new features every year, transforming it into an amazing all-in-one device.
But beneath the surface, the Quest 2 has some hardware problems out of the box. And all of its new software, including some experimental tricks, are hard to find without help.
Thankfully, we've used the headset from its outset and know exactly what you need to make a good headset become great. Our Quest 2 beginner's guide will explain which settings to change, which Quest games are best for VR first-timers, and all of the headset's shortcomings (like comfort and battery life) that you'll want to fix with accessories.
Hopefully, our Quest 2 tips and tricks should help you get on the right virtual path from the start!
Set up your headset and accounts
One thing we appreciate about the Quest 2 is that its set-up process is incredibly straightforward. Once you unbox it, charge it until the indicator light on the headset's right side switches from orange to green. While you wait, use a ruler to measure your eyes' interpupillary distance (IPD). The Quest 2's lenses have three IPD settings — 58mm, 63mm, and 68mm — and you'll want to slide them to the close-together, middle, or far-apart presets based on your measurement.
Once that's done, download the Meta Quest app on your Android phone or iPhone. You no longer need a Facebook account to use the Quest 2, which means you won't lose access to your games if you delete or lose your account. Instead, you'll create a Meta account while you set up the headset, and can choose to connect Facebook or Instagram if you want to find your friends who also have Quest headsets.
If you live alone or are the only VR fan in your household, you can dive right into gaming. But if your other family members want to hop in on the fun, you'll want to set up multiple Quest 2 accounts. This ensures each user has their own partitioned save files and leaderboard scores for games; and because the Quest 2 supports app sharing, any game bought on the primary account is free to access on the other accounts, so you won't spend any extra money.
Map out your VR environment

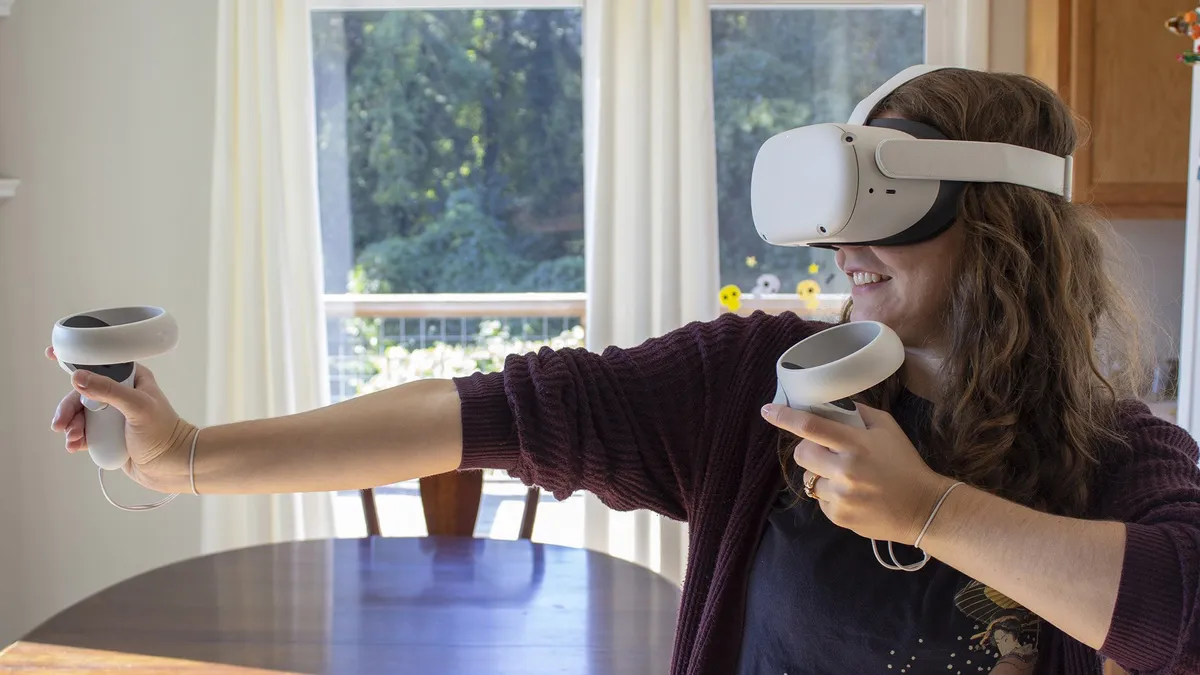
The more you become immersed in virtual reality, the harder it becomes to remain aware of your real-world surroundings. To avoid hurting yourself in VR, you'll need to clear out a safe space in your home free of obstacles. Ideally, you'd want a circle of cleared space with a 9-foot diameter, but many people make do with far less space.
When you first set up your Guardian boundary, if you choose roomscale, it'll ask you to draw a circle around you where it's safe to play. After that, if your head or controller approaches the border, a barrier will appear to warn you. If you open your Settings menu and go to the Guardian section, you can adjust how close you get to the Guardian before it appears.
While the Guardian is a start, it's perilously easy to punch or dodge through the boundary before your brain registers it, especially for fast-paced games. So we suggest setting it up so there's a bit of distance between the boundary and the actual obstacles in your room.
Depending on whether you have a dedicated VR room or if people will be walking through where you play, you may want to set up Space Sense, a useful tool that lights up any object, person, or pet that enters your Guardian space. To activate it, go to Settings > Guardian > Roomscale and toggle the feature on.
You'll also want to turn on the Double Tap for Passthrough setting, which lets you tap the side of your headset at any time so you can see your surroundings using the external cameras, without having to take off your headset. Then you double-tap again to go back to your game. Go to the full Settings menu, select Guardian, and activate this setting.
Choose the right games for beginners
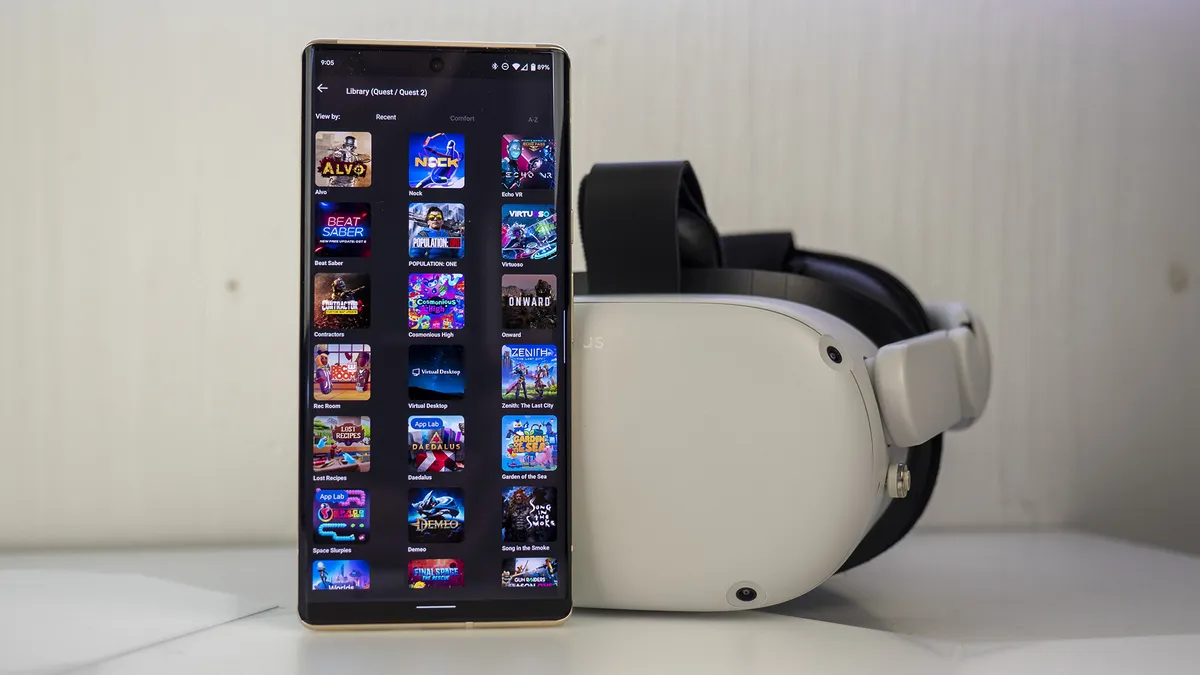
Experiencing nausea in VR can be unavoidable for first-timers, especially while playing games where your character moves around via a joystick while you stand still. You get motion sickness (or "simulation sickness") because your eyes see "you" moving around the virtual world, but your inner ear feels your body remaining still. That nausea can persist for hours after you take off the Quest 2.
Getting used to this eye-ear discrepancy is nicknamed "gaining your VR legs," and it takes time. So you'll want to start out with the VR games that'll ease you into the format. On that point, we've written up the best Quest 2 games for first-timers, with gameplay that specifically avoids motion sickness while still immersing you in new worlds.
To quickly summarize, you'll want to look for rhythm games where you stand still and objects come to you, like Beat Saber; fixed-perspective games like Moss or Little Cities where you're looking down at the moving world from a god-like vantage; or sims like Painting VR where there isn't any movement at all! In each case, your inner ear will thank you.
Next, try out hand-tracking games. These games let you set down your Touch controllers and "touch" objects for yourself, with the headset's cameras detecting your hand positioning so you can interact with your environment. Most of these games are more sedentary puzzle games that work well for beginners, but convey the medium's inherent magic. They're great for kids trying VR for the first time, too.
Once you've eased yourself into VR, you may want to dive into Quest 2 rhythm and exercise games as your next step — even if you're not planning on using VR for regular workouts. Supernatural, Pistol Whip, and other experiences will transition you from seated to active VR. Your in-game movements correspond to your real-world squats and punching, so you won't experience nausea from artificial movement; plus, they're easy to lose time in, so you'll gain lots of VR endurance without even realizing it.
At this point, you should hopefully feel ready to dive into the rest of the best Quest 2 games. Many of them have full motion, which can take some getting used to; but they often also have a teleport feature that lets you move through the world without getting simulator sickness. Check the More Info section of its Quest Store listing to see its comfort level, and ease into the "Moderate" or "Intense" experiences.
Otherwise, you may want to try sideloading VR games that you can't find on the official Quest Store for whatever reason.
Grab some popcorn and stream content in-headset
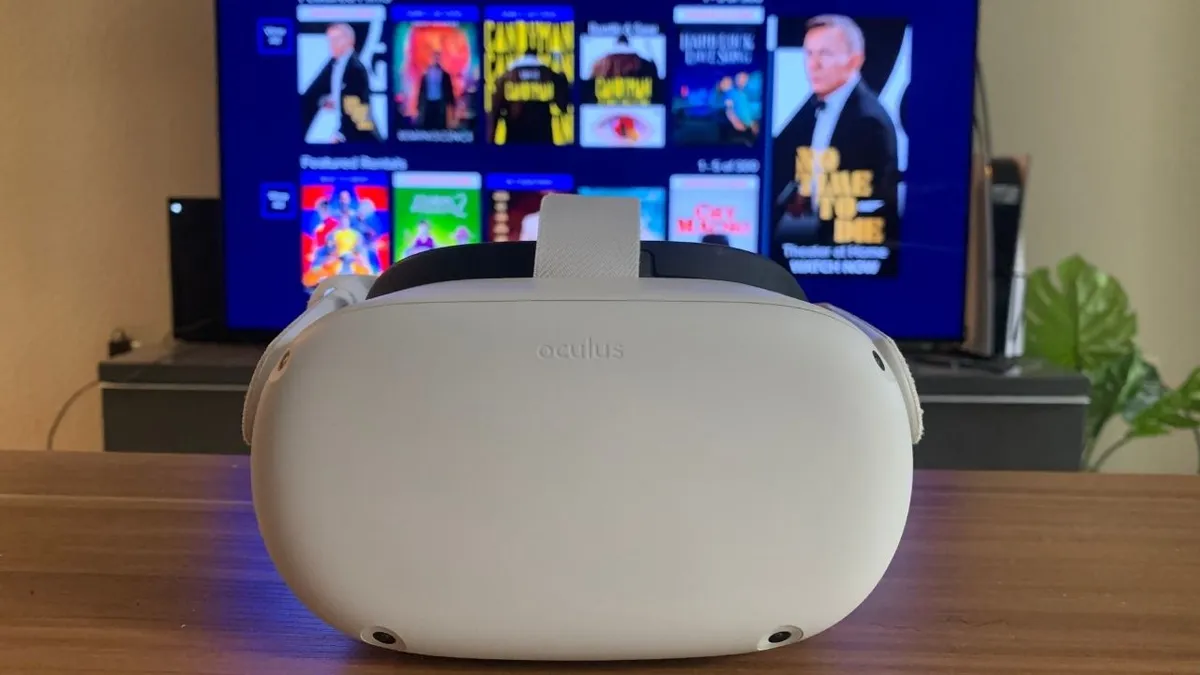
Most people buy VR headsets for gaming, but you'll find a ton of options for streaming content in-headset as well. Some of the best Quest 2 media apps include Netflix, YouTube, Prime Video, and even Vudu for renting the latest movies. You're still watching 2D content, but enjoying it in a virtual movie theater that adds to the ambiance — with a virtual screen that's much larger than what you have at home.
If you own physical movie files (we won't ask how), you can also watch those on your Quest 2 in a virtual theater if you want. Download the Skybox VR app on your computer and on the Quest, and you can view and stream your local movie files directly on your headset, without having to download files onto your Quest storage.
Whatever medium you choose, here's our advice: make sure you have the passthrough double-tap enabled since something in the real world will undoubtedly pop up across a two-hour movie; and if you're going to eat and drink, make sure to pair your drink with a straw so the Quest 2 doesn't get in the way!
Navigate more easily with voice commands
Enabling voice commands takes just a couple of minutes but will make your time using the Quest 2 much more seamless — though unfortunately, only English-speaking users in the United States can currently enable the feature. From the home menu, go to Quick Settings > Voice Commands > Start Setup.
You'll have the option to Enable Shortcut, which lets you double-tap the Oculus button to initiate a voice command. This is probably a better option than turning on the Hey Facebook wake word option, so your Quest 2 isn't in always-listening mode; but you can make either (or both) an option.
In this same Settings menu, you can change what your Facebook Assistant sounds like; or, in Account Settings > Voice Activity, you can delete your voice recordings at any time if you want.
With Quest 2 voice commands, you can open a specific game, check your friends list to see who's available, shut down the console, and so on. Here are our favorite voice commands worth remembering:
- Shut down / Restart
- Turn up/down the volume
- What's my battery?
- Open Beat Saber
- Close game
- Start/ stop casting/ recording
- Take a photo
- Who's online?
- Start party
- (In media apps) Play/pause
Make VR a social activity
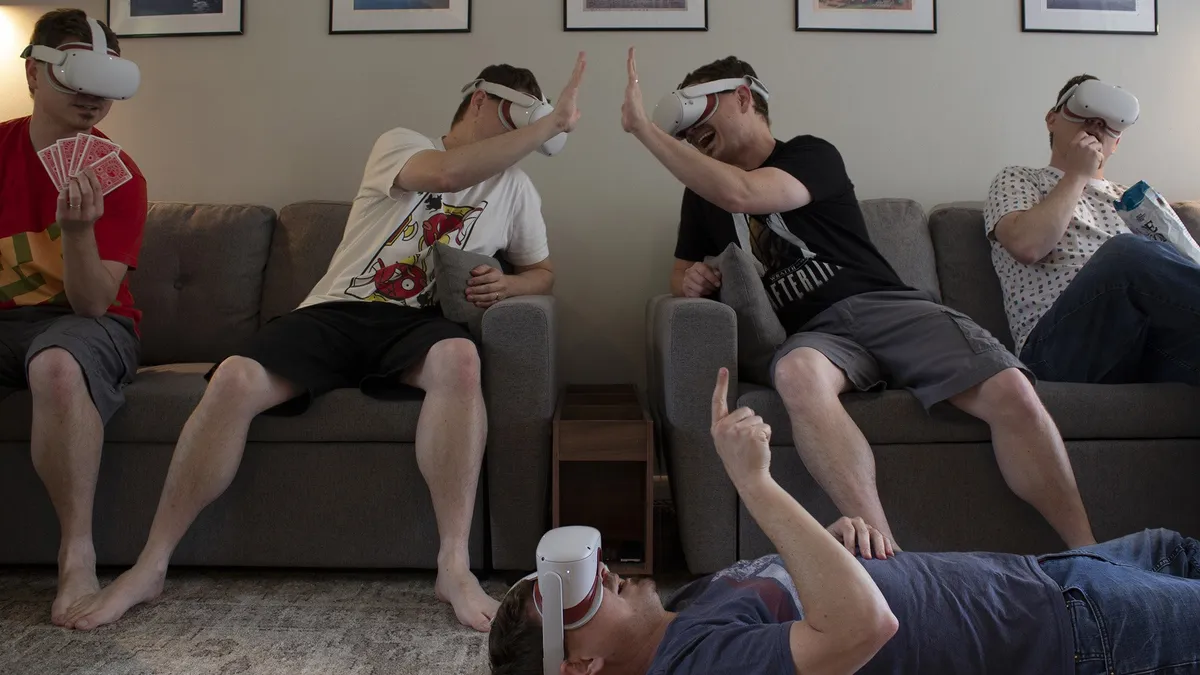
VR isolates you by design, but there are several ways to stay connected with loved ones or friends — whether they're physically in the room with you or hundreds of miles away.
In-person, you can cast the Quest 2 to your TV so others can see what you're doing. This ensures the people waiting for their turn to play Beat Saber can cheer you on and won't get bored watching you flail around without context; or, if you're introducing your kid to VR, it'll allow you to watch what they do and give them tips as they play. Simply open the Quick Menu with the Oculus button, select Sharing > Cast, and choose the device you want to cast to.
Connecting with friends virtually should be a snap as well, assuming your social media friends have their own Quest 2 headsets. On the Meta Quest app, select Menu > People to find recommended friends to Follow based on your current friends list or who you've played with. Depending on what Meta account privacy settings you choose, you may want to "share your profile" to make yourself visible to others, too.
Once you've built up your friends list, you can create a party chat so you can talk with them while you play a game together. Simply open the universal menu (using the Oculus button) and select the People icon. You'll see an option to Create Party, or you can look at your friends list, where any joinable parties will be visible. Whichever game you choose will limit your party size, likely down to 4 (or 8 in some cases). But some social VR games like Rec Room or VRChat could allow larger groups if you prefer.
You can also invite your friends to your Oculus Home when you create a party; then, when you enter a multiplayer game, your party should automatically travel with you, making it easier to keep everyone together.
Lastly, if you want to share your VR accomplishments in other ways, then you can capture and share screenshots or videos. You can trigger this from the universal menu, but using a voice command with the Oculus shortcut is faster. One other universal shortcut is the option to hold down the Oculus button, then quickly pull the right trigger to take a screenshot.
Then, just open your Oculus app and enable automatic sharing of your photos and video files from your headset to the app.
Set up your apps and notifications
VR will immerse you in fascinating worlds so effectively that you won't notice hours pass or hear your phone buzzing with real-world concerns. Rather than remove your headset to check notifications every so often, you can set up phone notifications on the Quest 2.
Open the Meta Quest app, make sure the headset is connected, then go to Devices > Headset settings > Phone notifications and pair your phone to the Quest 2 over Bluetooth. You can then specify if different types of notifications — Messages, Phone Calls, or Other Apps — always appear, only appear outside of games, or never appear. That way, you can make sure only the most important notifications disrupt your gaming.
Upgrade your Quest 2 strap and face cover

To make the Quest 2 affordable, Oculus/Meta cut several design corners compared to previous headsets. Because of that, you'll find plenty of areas for improvement where you can make the headset much more comfortable. Among these, your top two priorities should be fixing the strap and face cover; swapping them out will transform your VR comfort level.
We'd recommend starting with the strap, which doesn't provide enough comfort and support and tends to let the headset slide forward unless you strap it too tight. You can buy the official Elite Strap for an upgrade, but many of these Elite Strap alternatives offered better designs and comfort for lower prices in our tests.
Many of these strap replacements also serve a double purpose as a battery pack. Sorry for the bad news, new Quest 2 owner, but the headset only lasts a couple of hours from a full charge, so it could easily run low just as you're getting into the groove. But many strap replacements have built-in batteries that double the Quest's lifespan and balance out the front-heavy design so it sits more evenly on your head.
As for the face cover, Oculus issued a voluntary recall of its headsets due to the stock foam cover causing skin irritation. Now, all new Quest 2 units ship with a cheap silicone cover to throw over the foam, but you can absolutely do better. The best Quest 2 face covers don't just improve your skin comfort; they also do a better job of blocking light seepage around your nose and venting air to prevent foggy lenses, which can be a huge problem with the default interface.
Overall, we'd suggest looking at KIWI design as a starting point, since they make a wide range of straps, covers, and other accessories that greatly improve the Quest 2 experience.
Buy a case to avoid sun damage

When you first open your Quest 2, you'll see a temporary cover over the lenses with text that warns you not to let direct sunlight touch the lenses. VR headsets work by magnifying your view of the internal display with fresnel lenses; but these lenses also magnify and direct sun rays onto the display, permanently damaging it if you're not careful.
That's why you'll want to store your headset in a safe place where it can't be damaged, plus find a place to keep your controllers and accessories stored with it.
Among the best Quest 2 cases, the official Oculus model will fulfill your needs, while other third-party models offer harder, travel-ready exteriors or more room for accessories. Just be careful if you bought (or plan to buy) an upgraded strap, as some cases only fit the Quest 2 with the default strap.
It's time to Link your PC

Connect your Quest 2 to your PC or laptop, and you'll have access to PC VR games from Steam or Rift directly on your headset. Almost half of SteamVR players use a Quest 2 to play games, so you'll be in good company. But before you start buying PC VR games or cables, check Meta's Quest Link compatibility page to make sure your PC can handle the high graphical demand.
With that out of the way, you'll next need to figure out how to connect your headset to your PC. The official method is using the Oculus Link cable, but that's fairly expensive. We made a guide for the best Oculus Link cable alternatives that'll help you decide if you want to use a wired or wireless connection.
If you don't want to spend any money, then you'll want to use Air Link, the wireless gaming tool built into the Quest UI. Whichever method you choose, we have a guide on how to play SteamVR on Oculus Quest that'll guide you through the steps.
With that, you'll have access to a wider range of games, both inside the Oculus Store and out. If you want some tips on what to start with, try the best SteamVR games to play with Oculus Link, where we've rounded up our favorite recommendations!
We hope that our Meta Quest 2 tips and tricks guide will give you a good start with your virtual reality journey! We couldn't cover everything, so we recommend spending about 15 minutes diving through the full Settings menu to see what else you can use.
Oculus Move lets you set caloric burn goals for if you're using VR for your daily exercise routine. If you're doing a lot of socializing, you can play with your avatar to make it a better representative of you. You can connect a keyboard and mouse to the Quest 2 and browse an internet browser in-headset. And you may want to look at the experimental settings for other cool options.
Otherwise, if you want to know more about the world of Quest, check out our round-up of all the latest Meta Quest 3 rumors or our review of the next-gen Meta Quest Pro!

An endless supply of entertainment
From virtual movie theaters to exercise apps, the Quest 2 has a wealth of content for you to find and enjoy.

