How to use multiple accounts and app sharing on the Oculus Quest 2
Keep your save data separate while sharing the same games.
Get the latest news from Android Central, your trusted companion in the world of Android
You are now subscribed
Your newsletter sign-up was successful
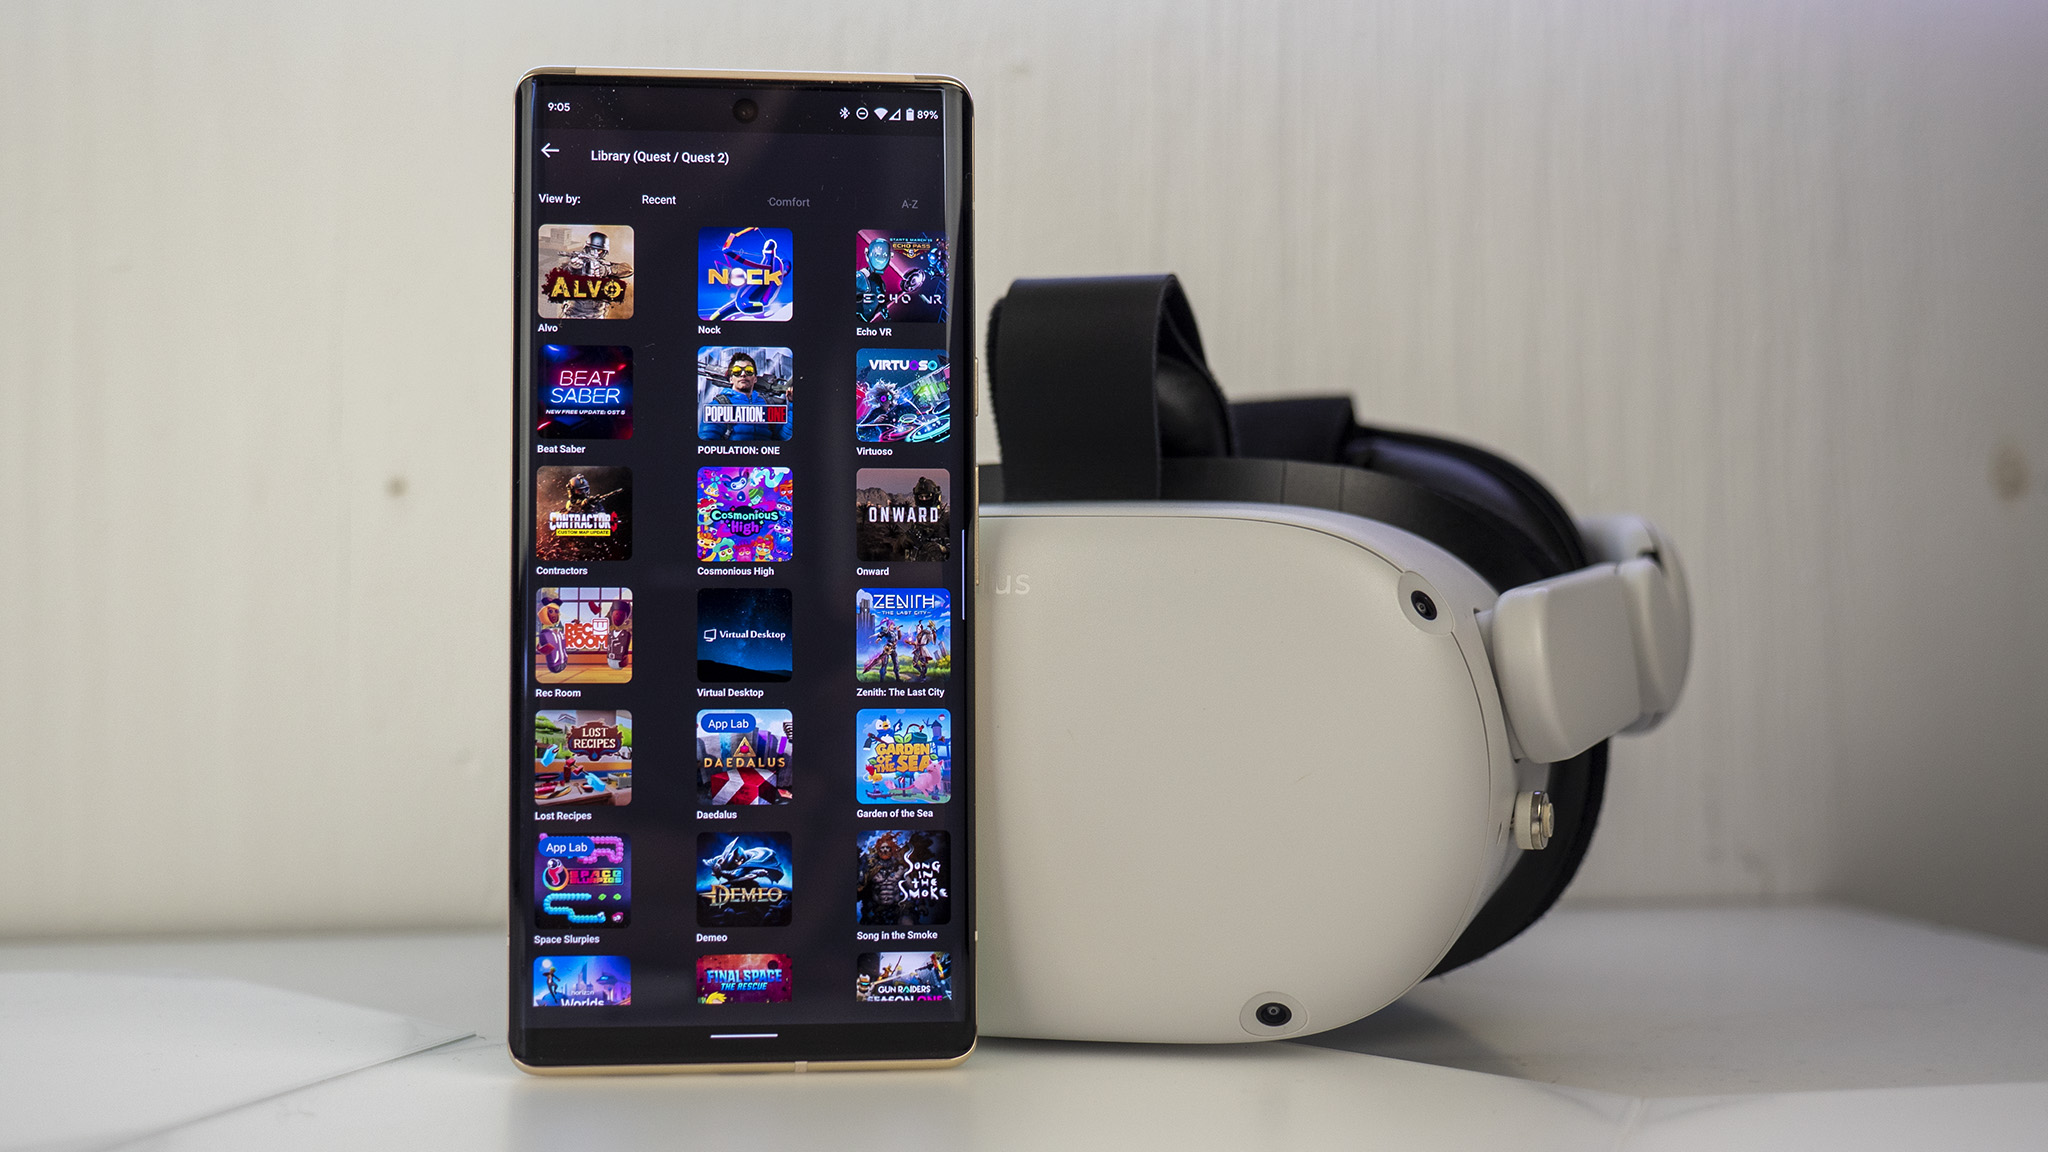
Meta may have sold about 10 million Oculus Quest 2 units, but a lot more than 10 million people use them. Many people share their headsets with loved ones, kids, roommates, or friends at parties. But sharing means those people can use (and mess up) your save files or multiplayer records. Thankfully, you can create multiple Quest 2 accounts while sharing game libraries between those accounts, keeping things separate without wasting money.
The process is slightly different now that you can create a Meta account for the Quest 2 instead of a Facebook account, but that's not a bad thing. Here's how to create new accounts and share apps between them.
How to create multiple accounts and share apps on the Quest 2
Before you start, decide who will be the "administrator" on your Quest 2. Whoever operates the primary account will have the option to delete the other accounts. Also, only apps bought on the primary account will share with the secondary users; any games bought on non-primary accounts will only be playable on those accounts. So the main account should likely go to whoever plans to buy the most games.
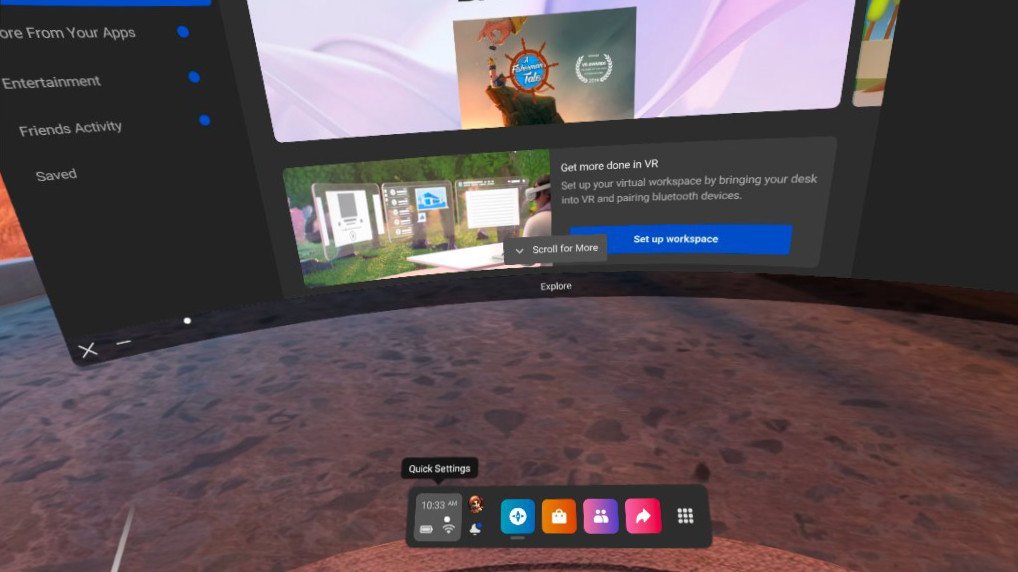
If you decide you want a different Quest/Facebook account as the administrator, you'll need to factory reset your Quest 2 and set it up from scratch. So get that out of the way if you need to. Then, follow the steps below to set up multiple accounts on the Quest 2:
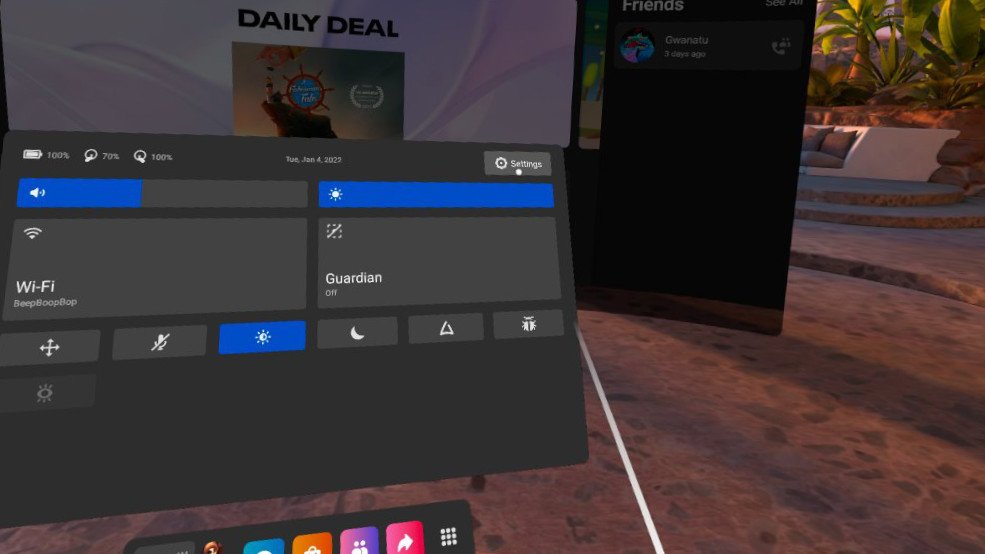
2. From the full menu, select Settings in the top-right.
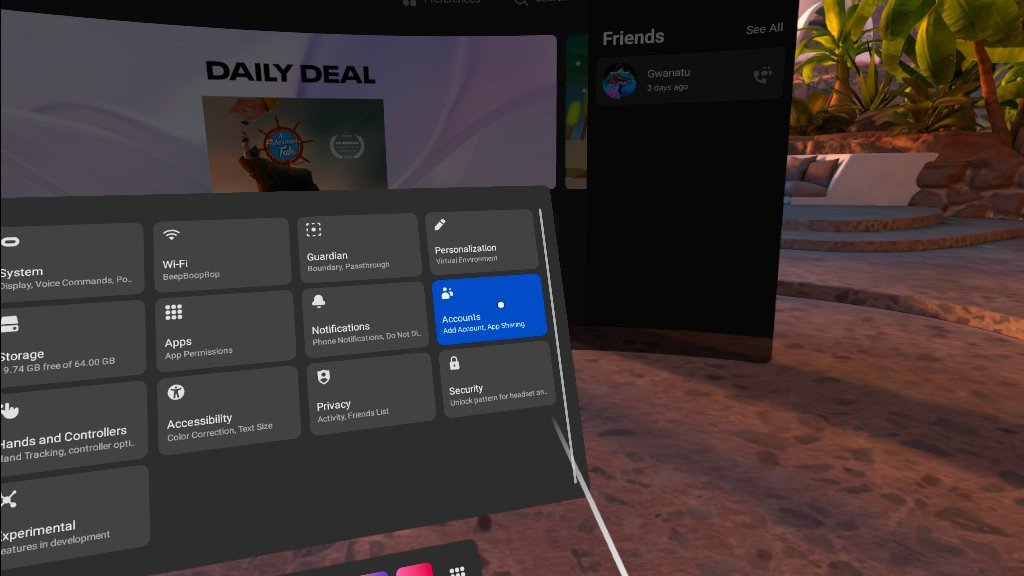
3. Select the Accounts Settings menu.
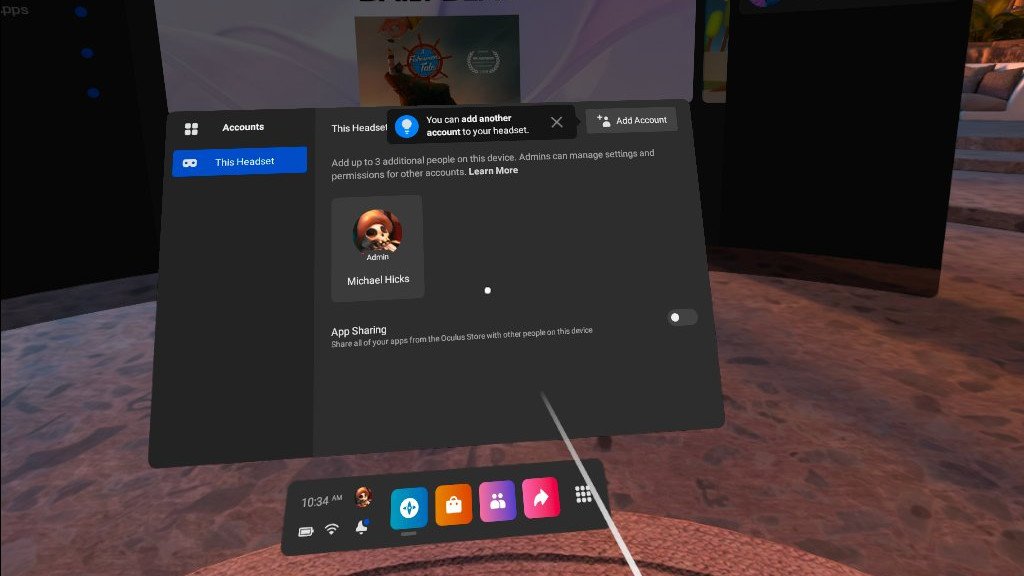
4. You'll find your main Admin account icon and an option to Add account in the top-right.
Get the latest news from Android Central, your trusted companion in the world of Android
5. You'll be prompted to set up a pattern passcode to lock your Admin account, to ensure that other users can't access the main account. You can skip this step if you trust other people in the household, but should add one if you have a kid that might try to buy a game on your account.
5a. Write down your pattern, as you'll be locked out of your account and forced to factory reset if you forget it.
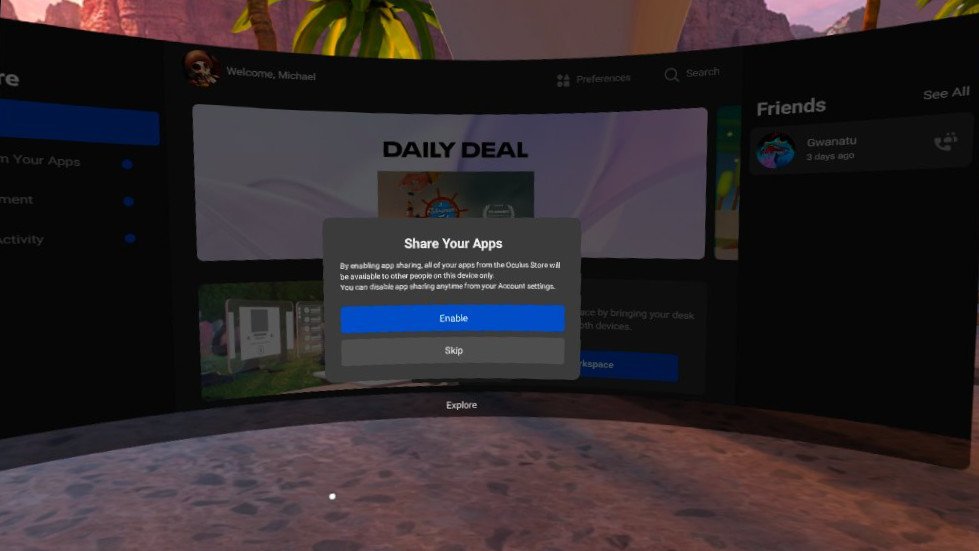
6. It'll also ask you whether or not you want to enable app sharing on your Quest 2. In doing so, all of your Oculus Store purchases will be available to other users on this headset only. Select Enable or Skip.
7. You'll be prompted to pass the headset to the new account owner. You can also continue to set up yourself if the other person is younger or tech-averse.
8. At this point, the second person must have or create a Meta account to proceed. We have a separate guide on how to create a Meta account which applies if they have a previous Facebook or Oculus account. If they haven't created an account before, ignore this step.
9. New Quest 2 users should go to meta.com/setup and follow the steps on that site. They'll need an email address or Facebook/Instagram profile to create the account.
10. Once they have a Meta account, go to meta.com/device, then put the headset back on and copy the 8-character code. Input it on the web page, and the second account will now officially be added to the headset.
11. Create a new 4-digit store passcode and account pattern passcode to protect the second account; once again, be sure to write them down so you don't lose access to either.
12. Watch the introductory video and enjoy your new account!
At this point, the new user should be able to access all of the Quest 2 games bought on the primary account. From the Universal menu, click the Apps icon on the right. You should see all of the primary account's games there.
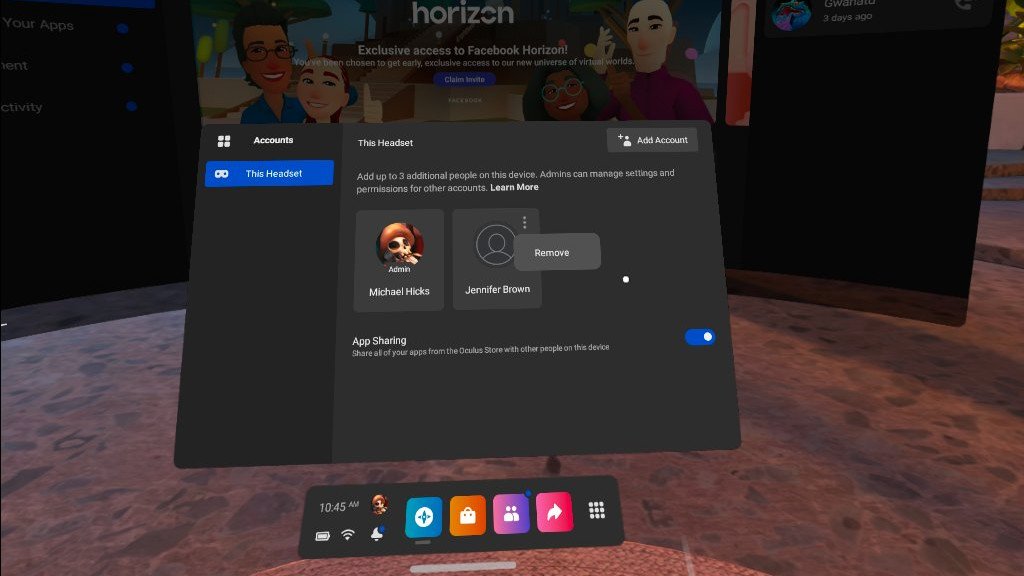
If you don't see them, make sure you have App Sharing enabled. From the primary account, go back to the Account Settings menu. You'll see a quick App Sharing toggle that enables (or disables) the feature.
Otherwise, secondary users can go to the Quest Store and download or purchase new games. Just remember that games you buy may not be available on the primary account.
How to delete accounts on the Quest 2
Maybe a loved one decided they just weren't into VR... or you and that loved one decided to break up. Regardless, it's surprisingly easy to delete a user account on the Quest 2.
Follow the same steps as before: Go to Quick Settings, main Settings, and Account Settings. Click the three-dot icon above the secondary account picture, then select Remove. You'll be asked to confirm this action, at which point that account will be gone! Any purchases associated with that Oculus/Facebook account will remain if you ever decide to re-add the account, however.
If you want to remove your account from a headset but don't have access to the Quest 2 in question, it's also quite simple. Go to secure.oculus.com/my/devices and Continue using your Meta account. You'll see any accounts associated with a Quest or Quest 2, including headsets "Shared with You." Simply "Remove myself from this device" to delete the account remotely.

Michael is Android Central's resident expert on wearables and fitness. Before joining Android Central, he freelanced for years at Techradar, Wareable, Windows Central, and Digital Trends. Channeling his love of running, he established himself as an expert on fitness watches, testing and reviewing models from Garmin, Fitbit, Samsung, Apple, COROS, Polar, Amazfit, Suunto, and more.
