How to hide personal photo data on your Google Nest and Chromecast displays
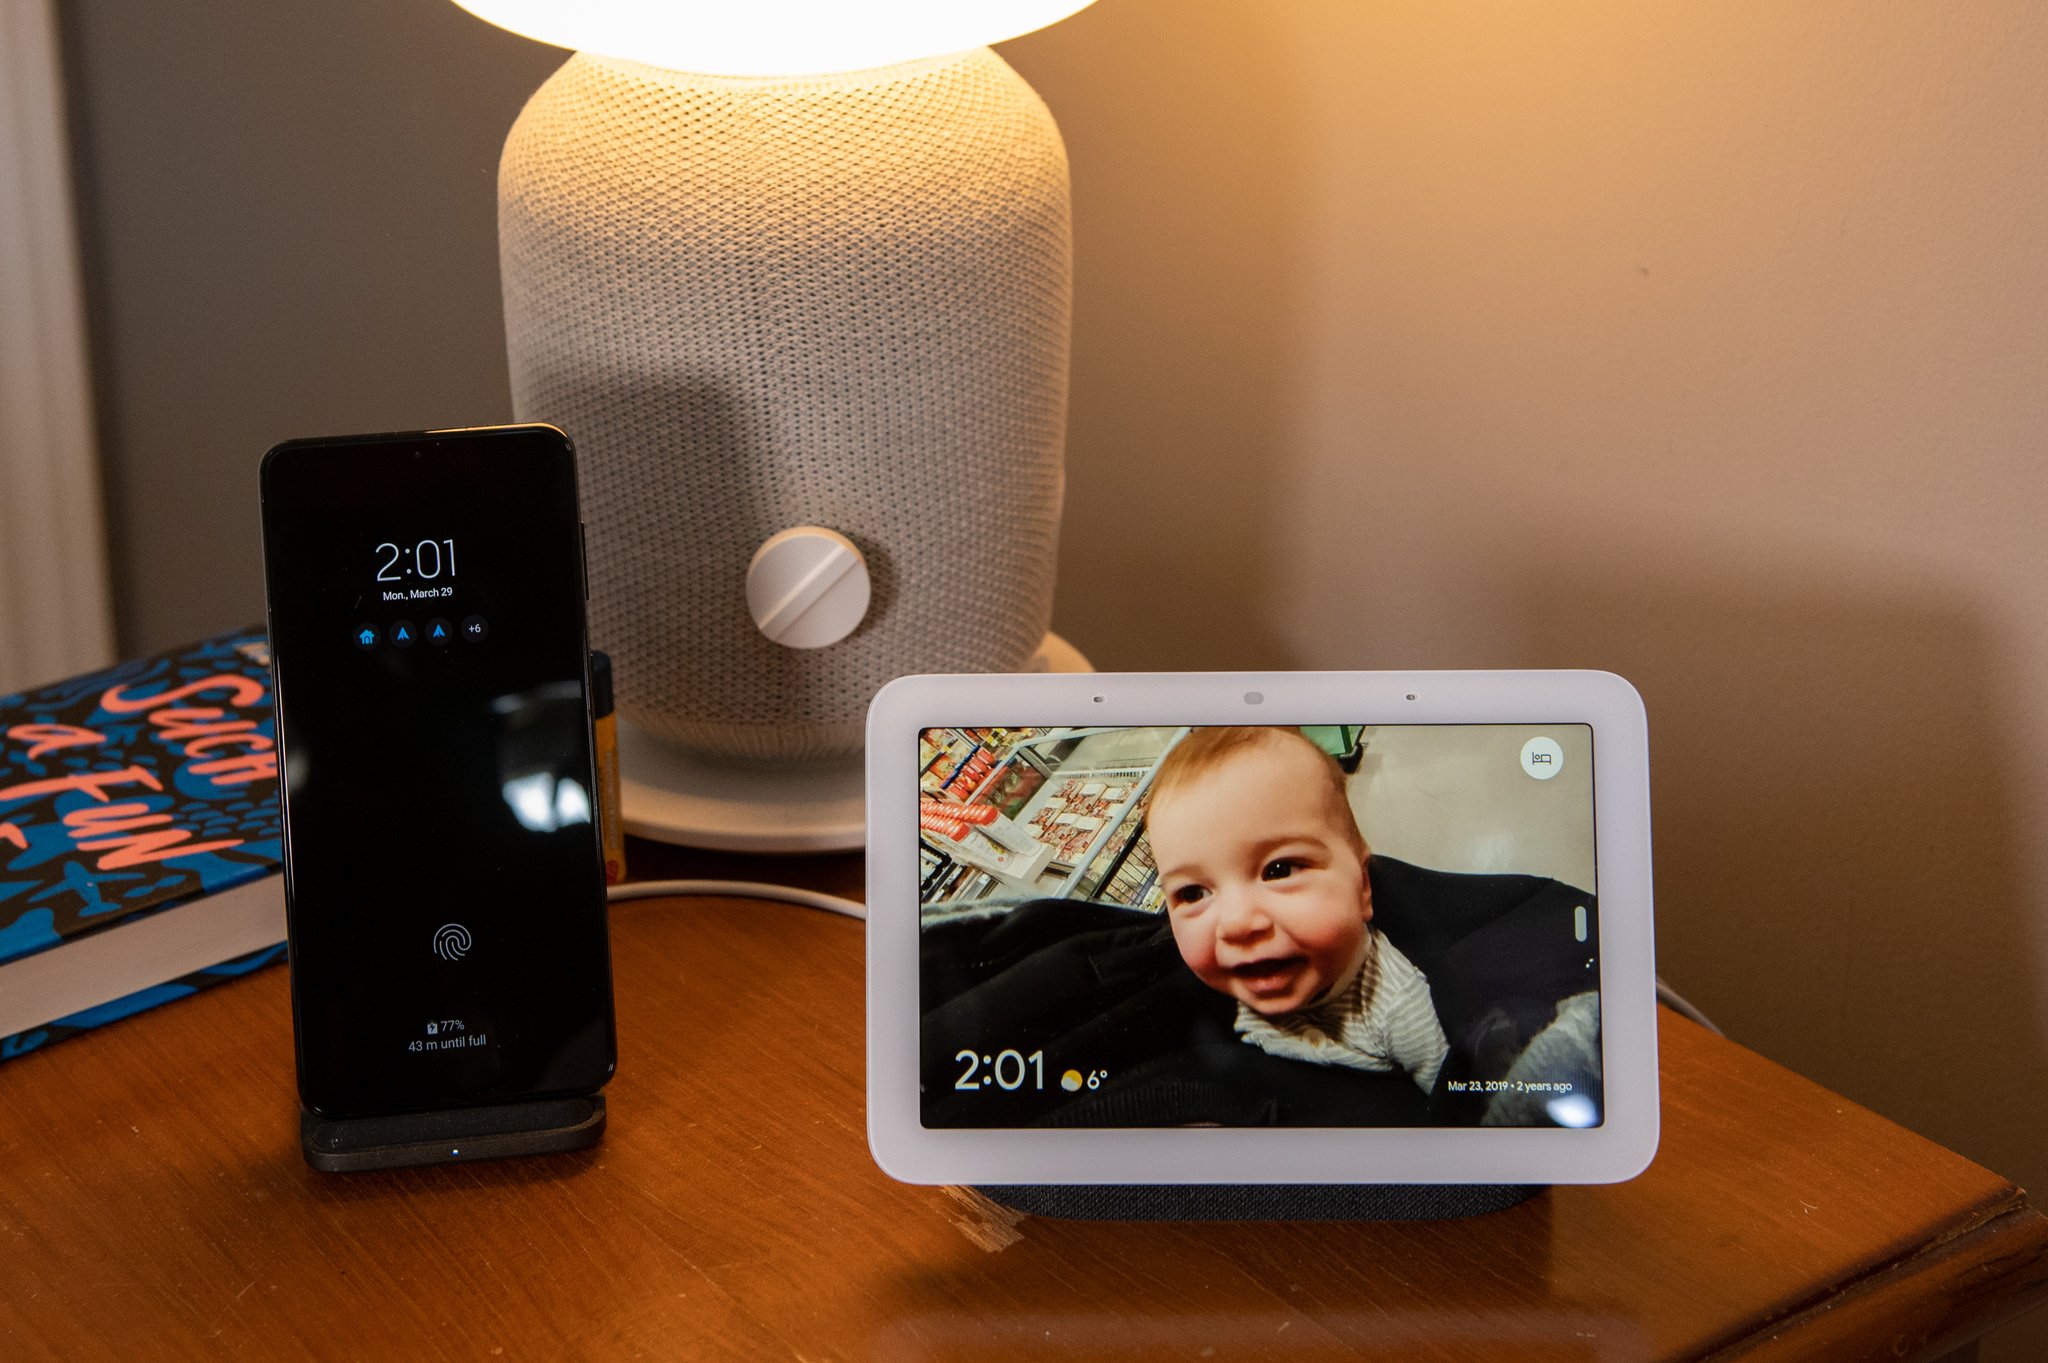
Google Photos is one of the best products that Google has ever put out. There are plenty of reasons why so many people love it. With a host of excellent features like automatically cataloging faces in your photos, auto-generating memories, creating cool effects to images, and so many more, it has earned the love. For those who have some of the best smart displays, like the Nest Hub Max, using them to show off your Google Photos is one of the best features — but you may not want your personal photo data to be shown off. So, here's how to keep that info to yourself.
How to hide personal photo data on your Google Nest and Chromecast displays
Along with Google Nest smart displays, you can also use Chromecasts to show off your Google Photos when those devices go into screensaver mode. But, the process of hiding your personal photo data is the same on all of those devices.
- Open the Google Home app on your phone.
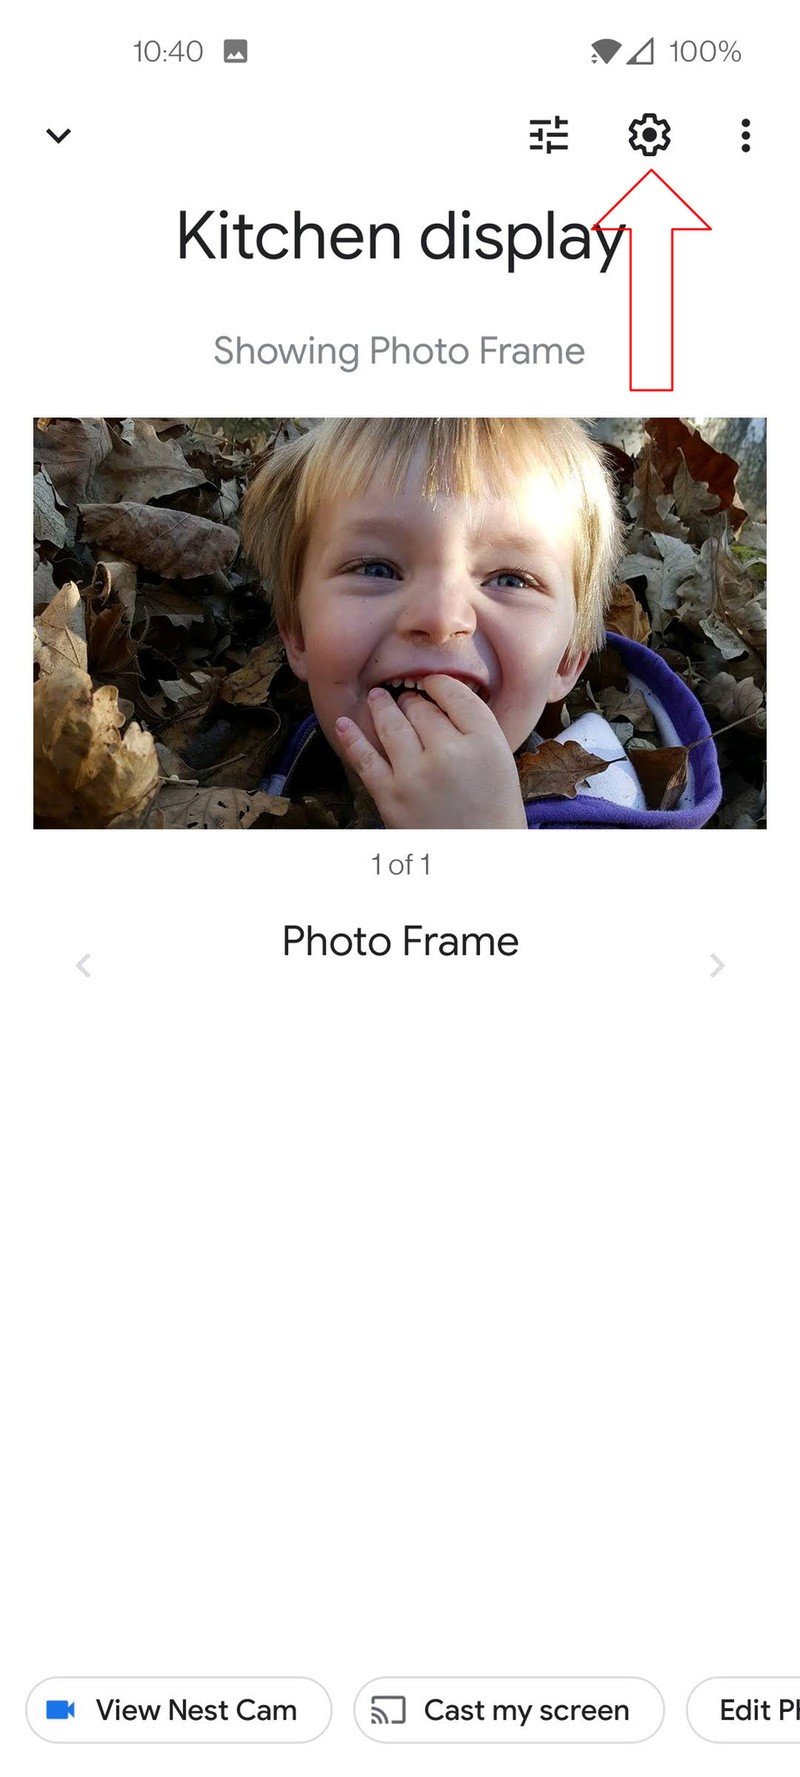
- Tap on the display or Chromecast device you want to hide the info from.
- Open the settings by tapping on the gear icon in the upper right corner.
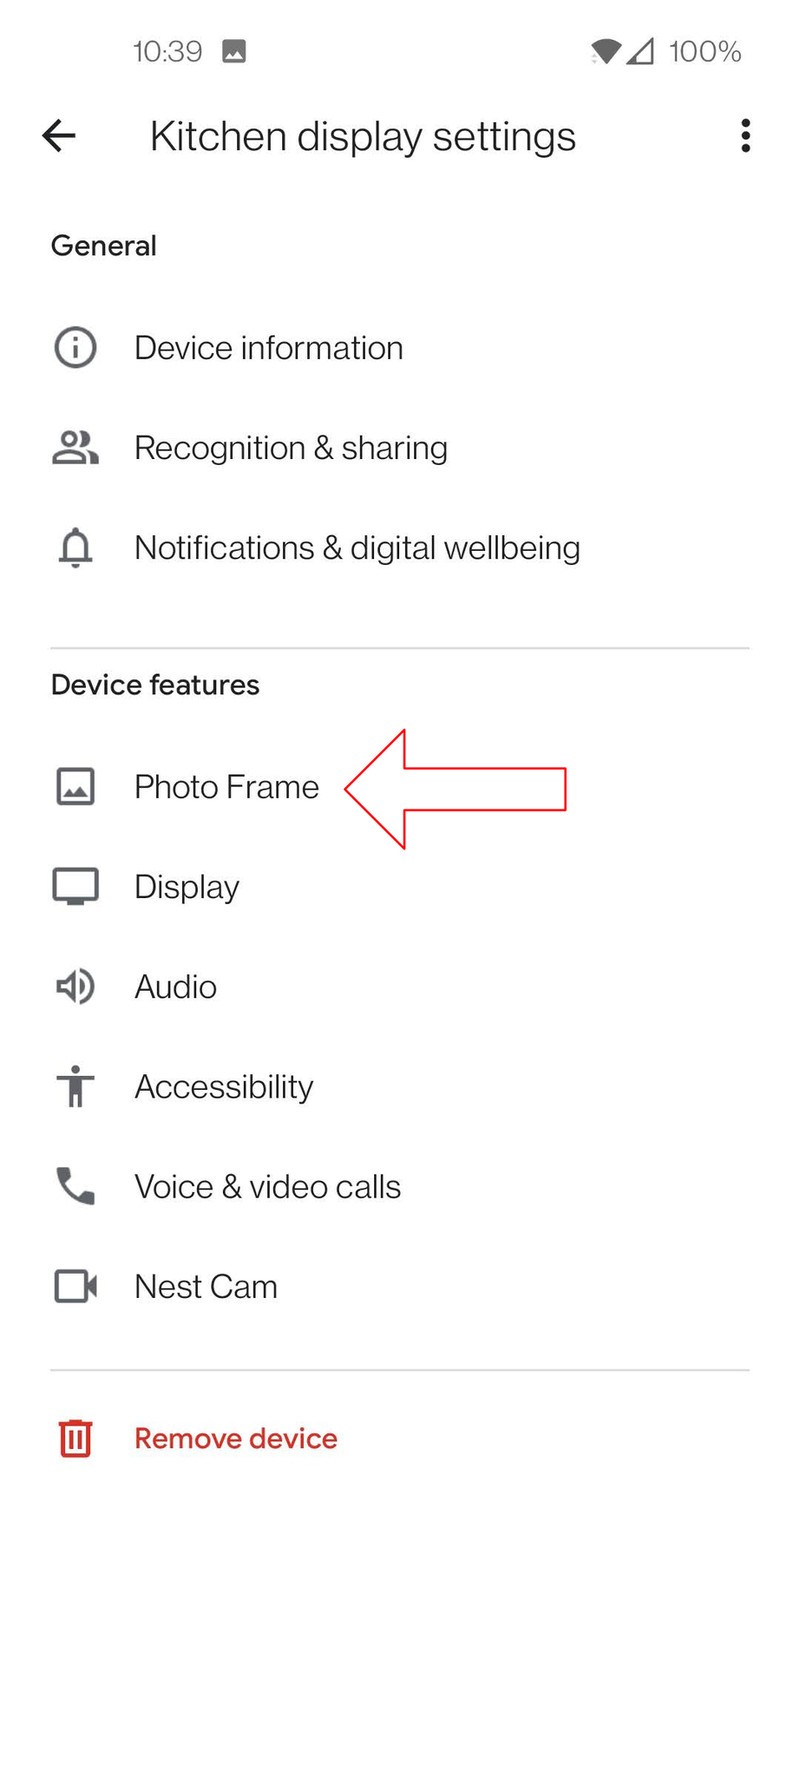
- Select Photo Frame under Device features.
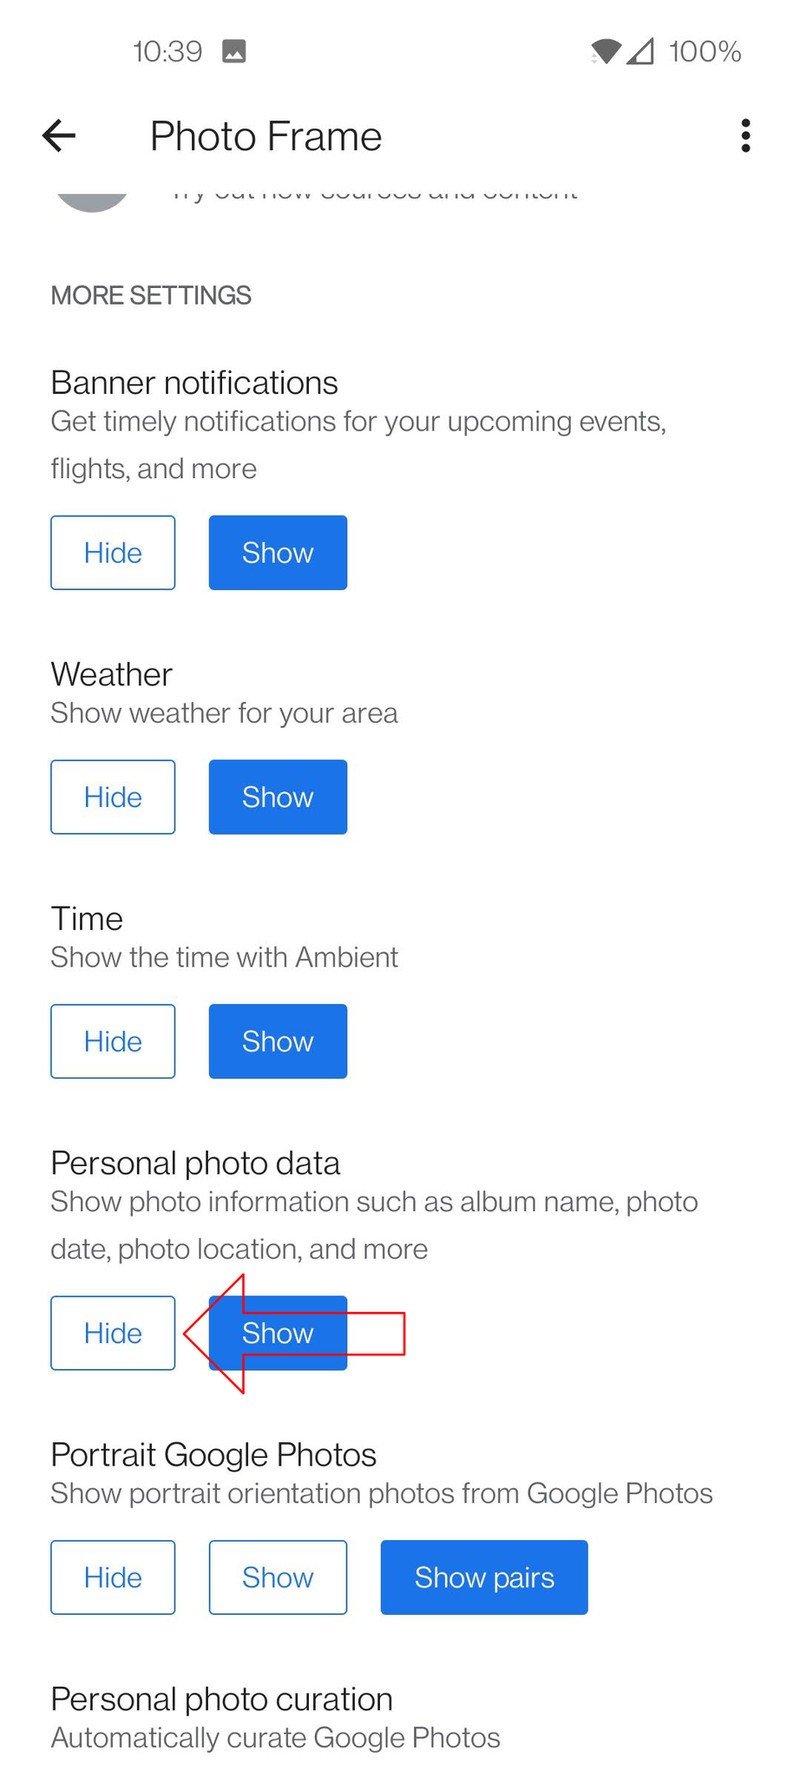
- Choose Hide under the Personal photo data section.
Source: Chris Wedel/Android Central
With the Personal photo data option disabled, when your pictures from Google Photos show up on your Google Nest displays or Chromecast devices, things like album name, photo date, location, and more will no longer appear. There are lots of tips and tricks with Google Photos that can keep some of that info from being recorded in the first place, along with lots of other fun things that Google Photos can do.
Using a smart display to access your Google Assistant and play music may be some of the most common uses for these devices. The displays are also excellent tools for controlling smart home devices, watching videos, and recipe guides. But, because these displays are so great at being up-to-date digital photo frames, we can forget that those pictures could have information that we don't want others to see — now you know how to remove it.
Get the latest news from Android Central, your trusted companion in the world of Android

