The only complaint you can make is that Google didn't release these features sooner.
Google has dropped a pretty notable update to its stock camera app, given it a proper name and at the same time opened it up to non-Nexus devices running KitKat in the Play Store. While the interface still isn't mind-blowing, it has changed pretty dramatically from what you'd be used to if you used a Nexus 5 just yesterday. Google has overhauled the picture-taking interface for regular shots, panoramas and Photo Spheres, while also adding a brand new feature called "Lens Blur."
We've taken some time to walk through the new interface, and you can color us impressed with the changes that have been made. While we know most of you will be able to get your hands on the app right away and give it a try for yourself, we're going to take a run through all of the latest features of the Google Camera app and give you a few tips for getting the best shots possible.
Use the quality settings!


If you just install Google Camera and never enter the settings menu, you'll be missing out on taking the highest-quality pictures possible. While I understand the decision to set settings to "low" or "standard" by default for performance reasons, those who want to make the most of their phone camera will want to make some changes in the app.
To take control, swipe in from the left side of the interface to show the camera modes, and hit the gear icon in the top right corner (in landscape) or bottom right corner (portrait) to enter the app settings. The big ones you'll want to see are at the bottom: Panorama Resolution and Lens Blur Quality. Tap into the first and switch to "Maximum," tap the second and go to "High." You'll notice processing time for panoramas and Lens Blur shots increase dramatically (as in, 2-3x the time), but you'll be greatly rewarded with much nicer looking photos.
Once you're in there, make sure the photo and video qualities are set as high as you like. Considering how much storage modern phones have available to them, I see no reason to set your photo or video quality any lower than the maximum. Use all of the resolution!
Standard pictures, HDR and video

When you launch Google Camera for the first time, the visual changes from the stock Android camera are quite obvious. First and foremost, what you see is now what you get when it comes to the viewfinder — you'll no longer be greeted with a 16:9 preview for a camera that will eventually take 4:3 pictures (hooray!). A small settings button in the corner of the viewfinder expands when tapped to give you options to turn on grid lines (hooray again!), toggle HDR, toggle flash and switch to the front-facing camera.
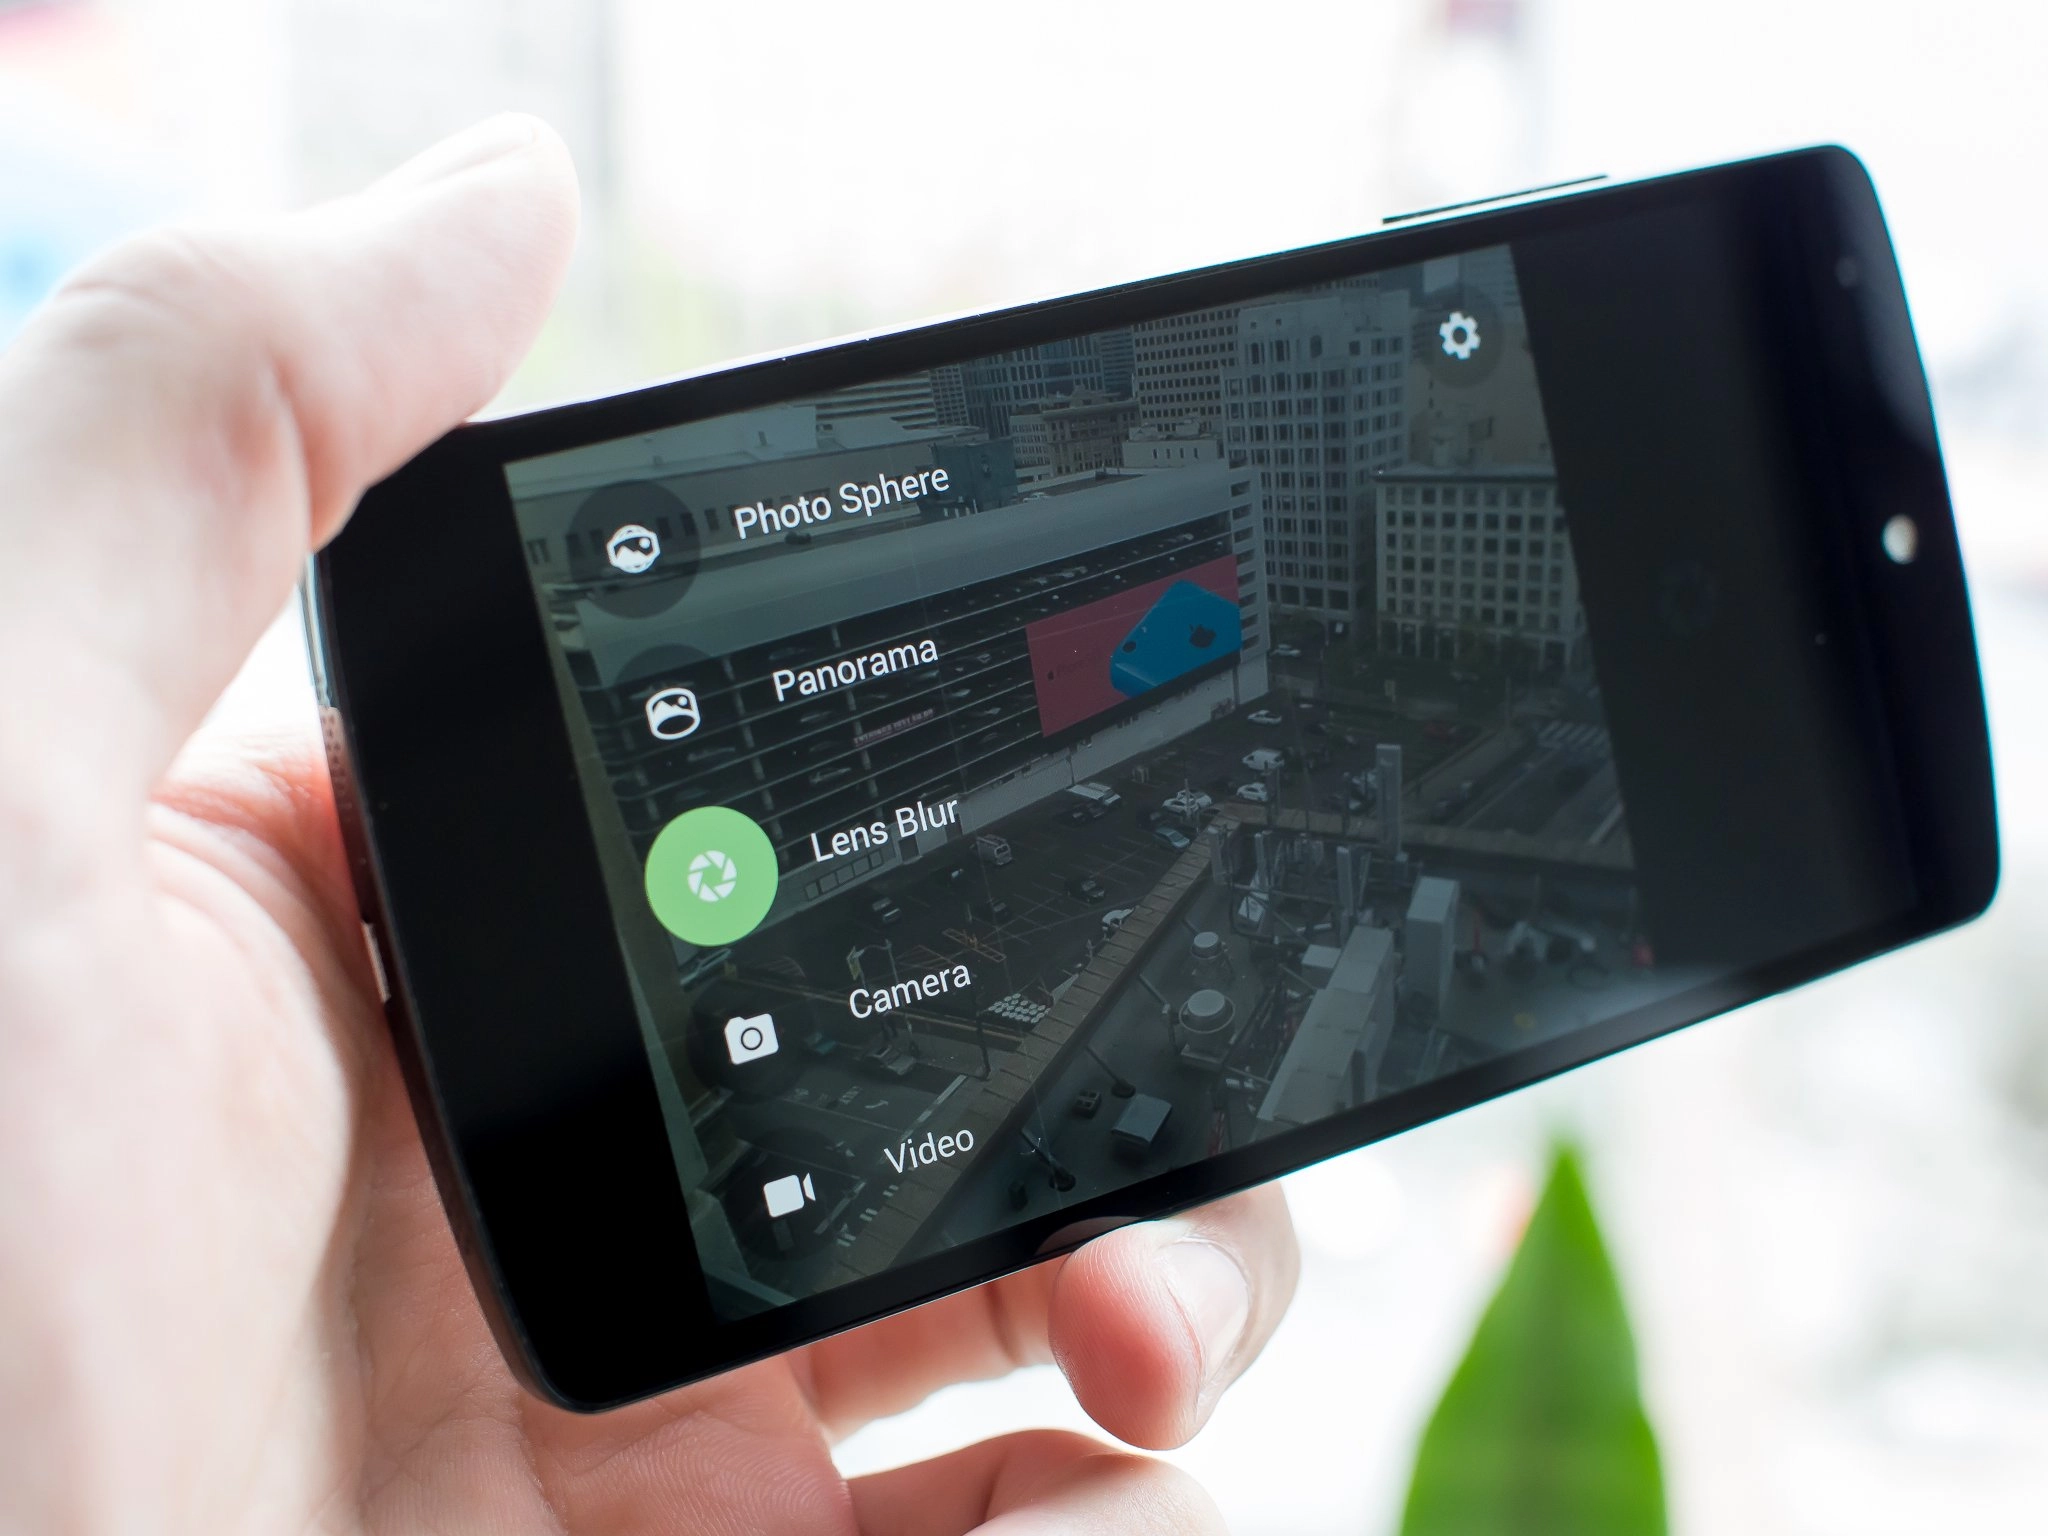
Swiping in from the left edge of the screen reveals multiple shooting modes (from top to bottom) — Photo Sphere, Panorama, Lens Blur, Camera and Video — each with their own colored buttons. The camera seems to switch very quickly between modes, and the transition from regular to HDR+ on my Nexus 5 seems to be quicker as well. The only downsides with the interface that I can find here are that when you flip the phone over 180 degrees, the shutter button doesn't switch positions to be on the left side of the interface for lefty shooters, and that there are no longer dedicated white balance controls (exposure controls, however, can be enabled in settings > advanced).
As far as regular pictures, HDR+ and video go, I can't say there's a dramatic change in photo quality from shot to shot compared to the previous camera interface. As someone who regularly keeps the Nexus 5 in HDR+ 99 percent of the time I can say I was impressed by some of the non-HDR+ shots I was able to take, but that will naturally be dependent on what device you're using. The biggest thing you'll notice in photo quality is how well you can frame and capture shots now with the grid lines turned on and the large capture button area that's easier to hit. Tap-to-focus also seems to help meter out pictures better, though, and I noticed that it did help a lot for non-HDR+ shots. Check out some example shots below (mix of HDR+ and regular modes) from a rather grey and rainy day.


And a quick 1080p video sample. Nothing seems to have changed here in terms of quality, but a nice interface feature gently reminds you to turn your phone into landscape mode to take video if you're holding the phone in portrait.
Taking the best Lens Blur shots

Nokia has Refocus, Samsung has Selective Focus, HTC has Ufocus, Sony has Defocus and now Google is getting in on the game With Lens Blur. It's a completely software-generated background defocusing feature that creates and artificial shallow depth-of-field effect on photos that are taken in the Lens Blur mode. The immediate difference maker here is that Google doesn't have the advantage of tailoring software to specific or purpose-built camera hardware, so things are a tad limited compared to other manufacturer's offerings.
Swipe in from the left edge of the camera app, switch to Lens Blur and you'll be ready to go. While it isn't clear precisely what the camera's doing in the background, the process you follow to take a Lens Blur picture is to simply center your subject in the middle of the frame, hit the shutter button then slowly move your phone upward and slightly toward the subject in an arc.
While the tutorial and on-screen guide show the feature being used in portrait mode, it actually does work in landscape as well with no noticeable difference in quality to my eyes. The trick to Lens Focus, it seems, is to move extremely slowly upward after hitting the shutter key. The on-screen guide will indicate that you're moving too fast if you suddenly jerk the phone upward, but if you can go extra slow it will improve the quality.
After you've successfully captured a Lens Blur photo, you'll have to wait a bit to render (even longer with the highest quality settings) and then the editing fun begins. Swipe over to the photo you just took, tap it and hit the small Lens Blur button (between the share and edit buttons) to change how the effect is applied to your photo. The interface is simple, but easy to understand. Move the slider at the bottom to choose how intense you want the software blur to be, and tap anywhere on the picture to change the point that will be considered "in focus" on the final picture. When you've made your edits, hit "done" and wait for the photo to re-render in the gallery.


It's pretty easy to go overboard with the Lens Blur feature, and considering that this is a completely software-based effect the limitations of what it can do while looking good are very apparent when you try to go too far. I've found that the default amount of blur (somewhere around 20 percent on the slider) is actually quite good, providing a realistic depth-of-field effect that a phone could likely take. Go anywhere over the 50 percent mark on the slider and you're getting into a territory where nothing is going to look properly in focus. The same goes for selecting the focal point — deviate too far from the original focal point you chose when taking the picture, and things will get clear as mud.
When you dial in the Lens Blur effect just like you like and let it render out, you can share the pictures out anywhere that you'd normally share a standard picture. This is probably the best part of this implementation — there's no fancy sharing system or specific app to view the pictures. The original photo is still editable on your phone, where you can change and re-share it at any time. The results from my excursion out to the market are a relatively mixed bag, but I'm extremely impressed with what's possible if you take your time with the composition and don't go too far with applying the defocus effect.
Panoramas and Photo Spheres

Panoramas and Photo Spheres haven't been dramatically touched in the Google Camera, but panoramas in particular have been improved. Panoramas now take on an interface that's nearly identical to the old Photo Sphere layout, which lets you take several individual pictures — using dots as guides to keep you centered — that are then stitched together. The results are drastically better than the old "sweeping" method, and work in both portrait and landscape mode.

Photo Spheres are basically the same, with the same quirky stitching errors that are mostly based on the proximity of objects to you and your ability to have an extremely steady hand while taking them. The big thing here is that Photo Spheres are now available to even more devices, regardless of whether or not they say "Nexus" on the back. Try your hand at a Photo Sphere or two, and be sure to share them on Google+ or to Google Maps so that people can see them in their complete quality.

