How to set up a NAS server as the best offline Google Photos alternative
Google Photos is the best utility for seamlessly backing up your photos and videos to the cloud, and the service's unlimited high-quality uploads made it the de facto choice for hundreds of millions of users around the world. But starting June 4, Google will start counting high-quality uploads toward your storage quota, so it's entirely likely that you will have to buy a paid Google One plan to be able to continue using Google Photos.
We've already listed the best Google Photos alternatives — including OneDrive and Amazon Photos — and now I want to talk about offline options. I use Google Photos' high-quality option to back up photos and videos from my phones, and while Google does a great job preserving quality, I use a network-attached storage (NAS) server to store the original copies. The best part about using a NAS is that you control the data; as it's stored offline on your own network, you're guaranteed privacy.
So if you're considering an offline alternative to Google Photos, here's what you need to get started.
How to pick the correct NAS for your needs
NAS enclosures are available in plenty of varieties. You can pick up a two-bay server that costs under $200 or go for a six-bay enclosure that retails for well over $1,000. When selecting a NAS, you'll need to figure out what you want from it. A home server is immensely versatile, allowing you to store not just your photos and videos but also for storing your movies and music collection, back up data from all the Windows and macOS machines in your home automatically, set up your VPN server, and so much more.
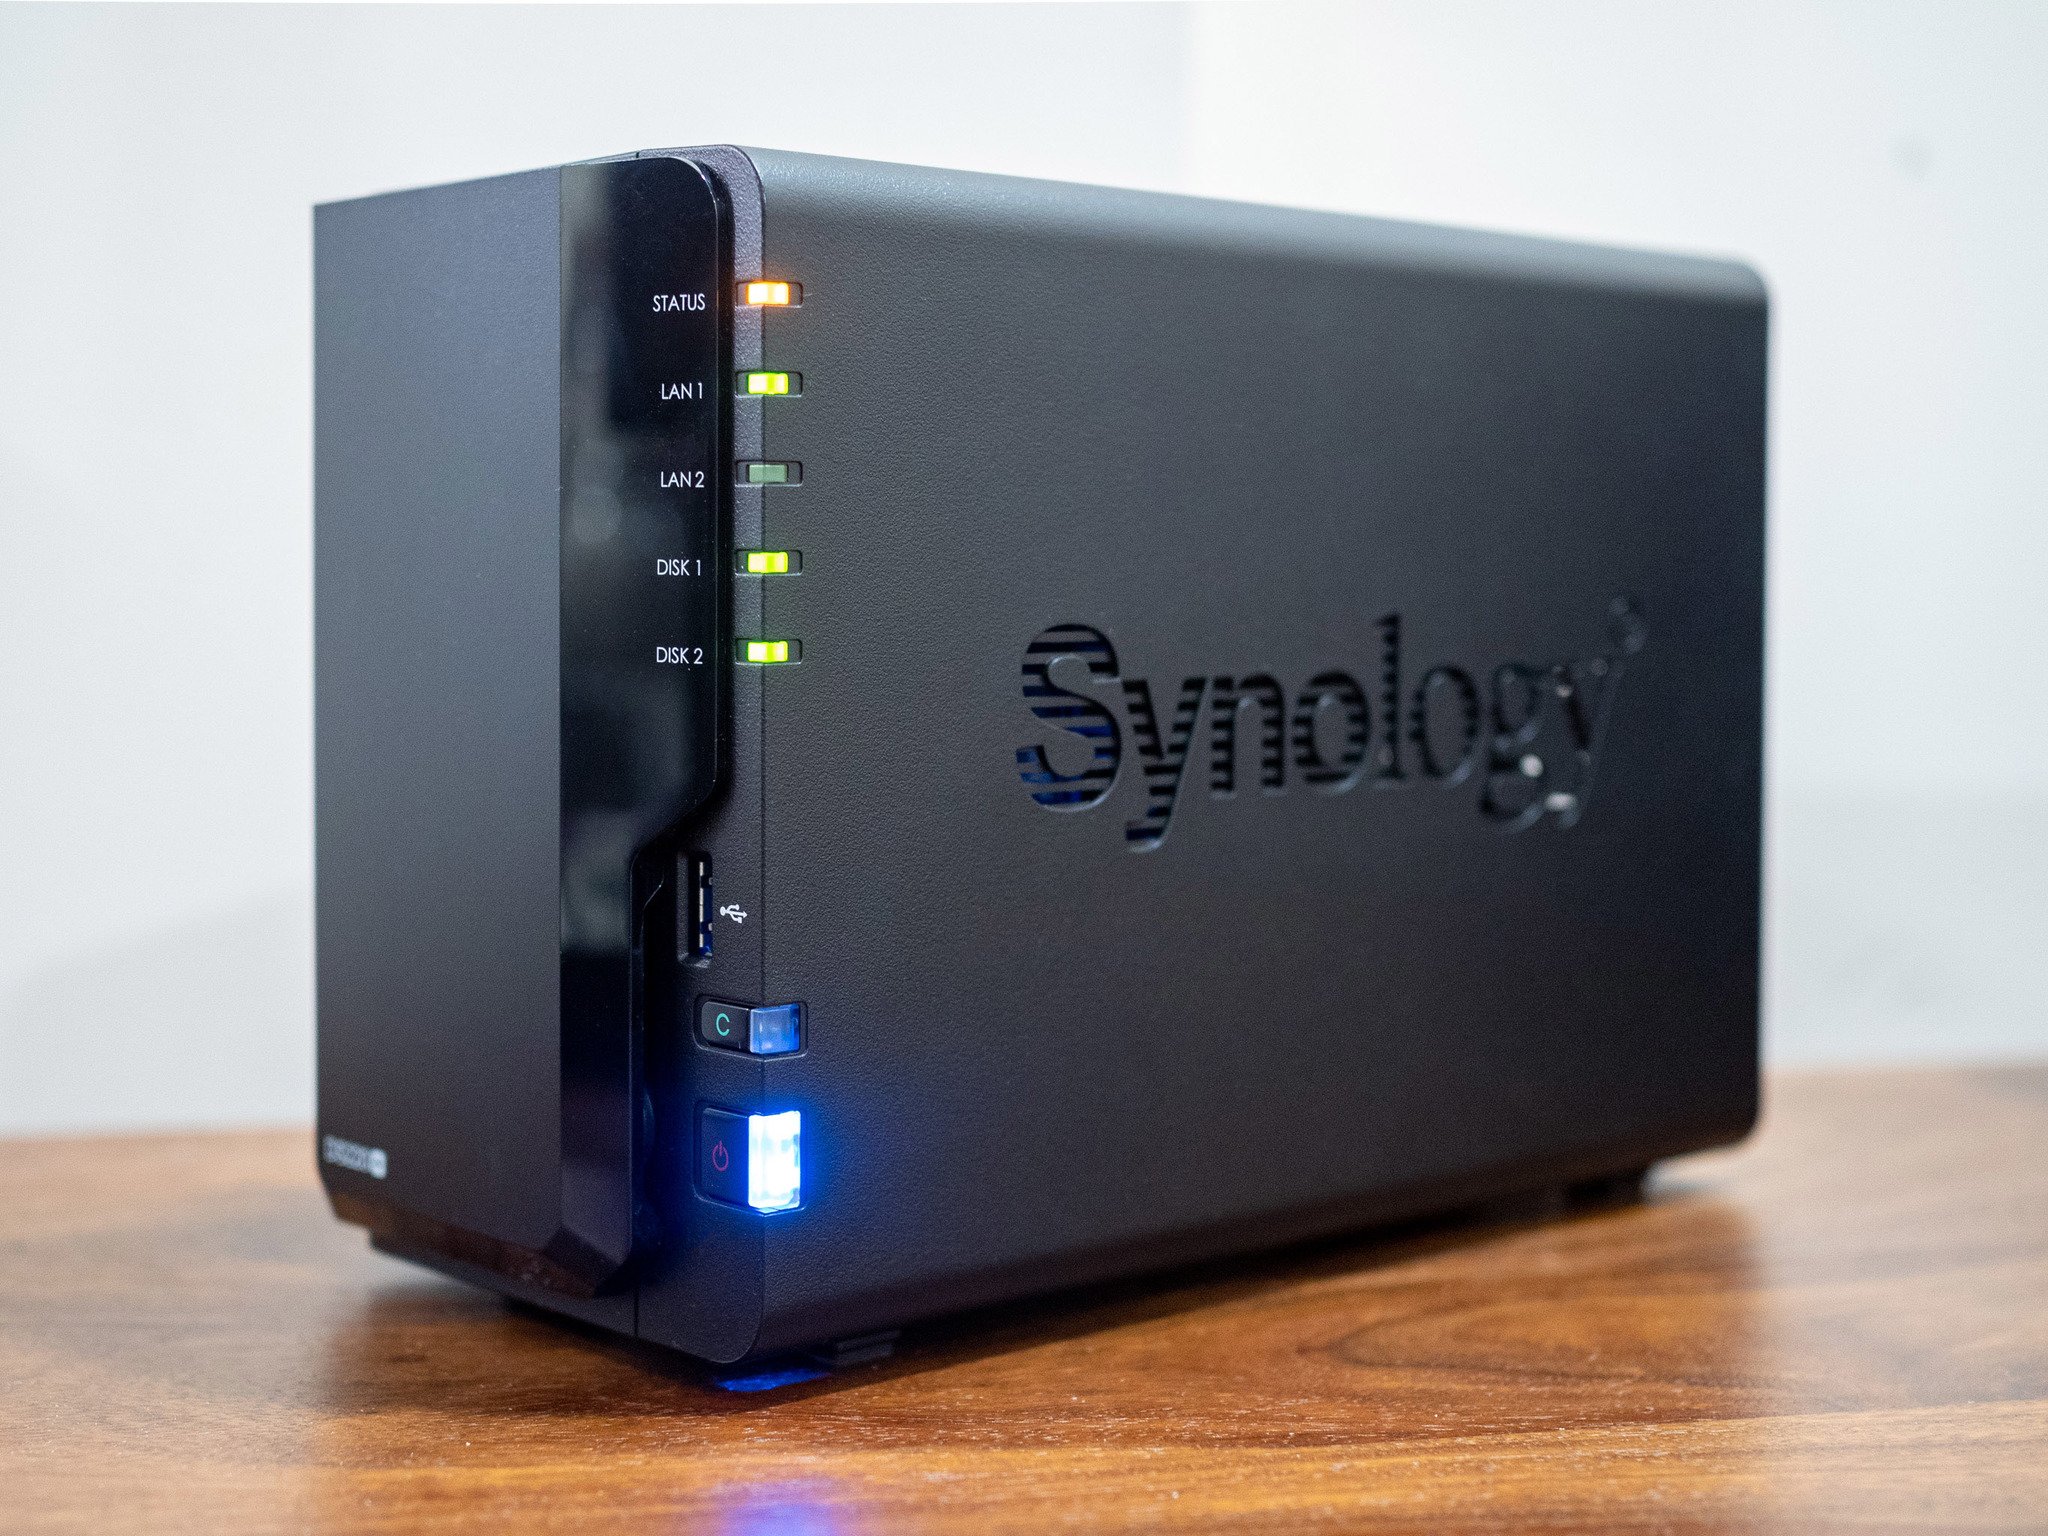
For first-time NAS buyers, I highly recommend the DiskStation DS220+.
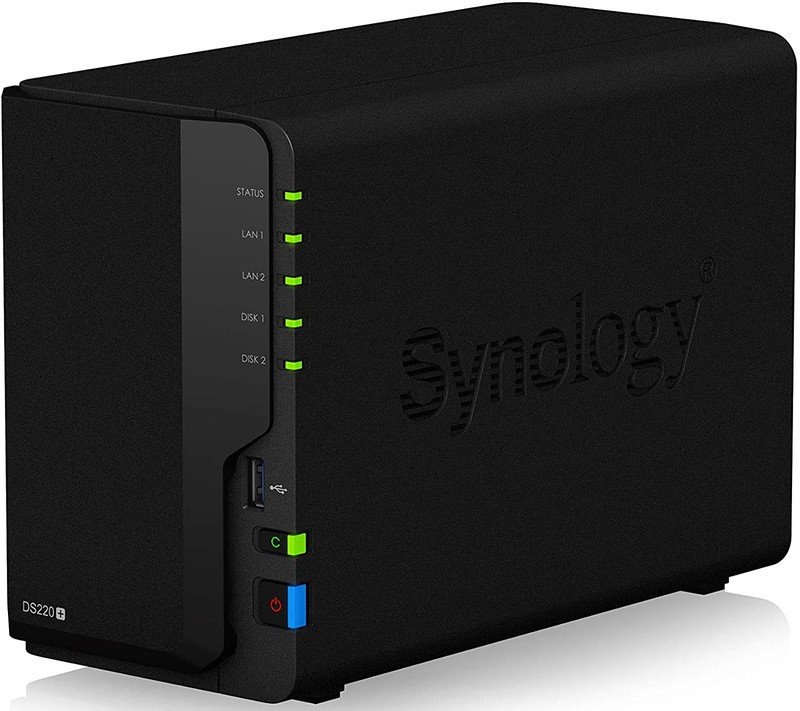
Most NAS enclosures do not come with a hard drive installed, so you will have to factor that into your purchasing decision. For this particular use case, the best NAS for most users would be Synology's DiskStation DS220+. It is a two-bay NAS with a powerful chipset, dual Ethernet ports, and USB 3.0 connectivity. The power on offer here is more than adequate for most home users, and the DS220+ is the ideal way to get into
I'm generally partial to Synology's NAS systems as they have the best software features in the industry, and that's no different with the DS220+; you can use it as a Plex media server and stream videos to connected devices, set up your own mail server, host a website, and use it as a centralized gateway for storing photos and videos from all the phones in your home.
You can run your own private photo, video, and music streaming services straight off the NAS, and the best part is that you can access the data even from outside your home network should you wish to do so. You also have the ability to set up user accounts for your family members and have them back up photos and videos from their devices straight to the NAS.
Get the latest news from Android Central, your trusted companion in the world of Android
I rounded up the best NAS for home users, so you may want to take a look at the post if you want more options. The DiskStation DS920+ is a robust option if you want four drive bays and additional memory, but for most users that are just starting out, the DiskStation DS220+ is the ideal choice in 2021. Because a NAS enclosure is designed to run 24/7, you'll need suitable hard drives. I've also rounded up the best hard drives for NAS enclosures, with Seagate's IronWolf drives being my recommendation.
Store everything locally
The DiskStation DS220+ makes it easier than ever to store photos and videos from all the phones in your home. The hardware combined with the exhaustive software features gives the NAS a distinct edge in this category, and if you're just starting out with a storage server, you will love what the DS220+ has to offer.
How to automatically back up photos and videos to your NAS
After you've picked up a NAS, you'll need to configure it. I'll be using Synology as the reference for this guide, and to set up a DS220+, all you have to do is slot in a hard drive, connect the Ethernet port to your router, and just power on the NAS. As soon as it boots up, it will be visible on your home network, and you can go to find.synology.com and follow the instructions on-screen to set up an account and install the web-based DiskStation Manager interface.
Synology Moments is a Google Photos clone that does a fantastic job with photo management.
Once the NAS boots into the home screen, you will need to install a few packages to back up photos and videos. Synology has several options to back up photos and videos, with Photos Station being the default choice for the longest time. Moments is a recent addition, and it is geared toward home users.
There's a detailed breakdown between the two services if you want to learn more. Going forward, Synology is investing resources toward building out Moments, and with the upcoming DiskStation Manager 7.0 update, Photo Station will be merged into Moments to create a new service called Synology Photos. So if you're just getting started, the ideal utility to use for managing your photos and videos is Moments.
To install the service, head to the Package Center, and install Synology Drive Server and Moments. Synology Drive is similar to Google Drive; it lets you back up data from connected machines effortlessly, and you can also create collaborative documents and spreadsheets within your home network.
Moments is essentially a clone of Google Photos. It has a timeline view of your photos, lets you create shared libraries, and even automatically organizes your photos into albums by leveraging facial recognition. Honestly, it is a fantastic utility for photo management, and if you're reticent to switch from Google Photos because of its auto-sorting and timeline features, you don't have to worry — think of Moments as an offline Google Photos.
Once you install Moments on your NAS, all you need to do now is connect it to your phones so it can automatically upload photos and videos from various devices. To do so, you'll need to download the Moments app on your phone — it's available on the Play Store and App Store. Here's how to then set it up to automatically back up photos and videos from your phone:
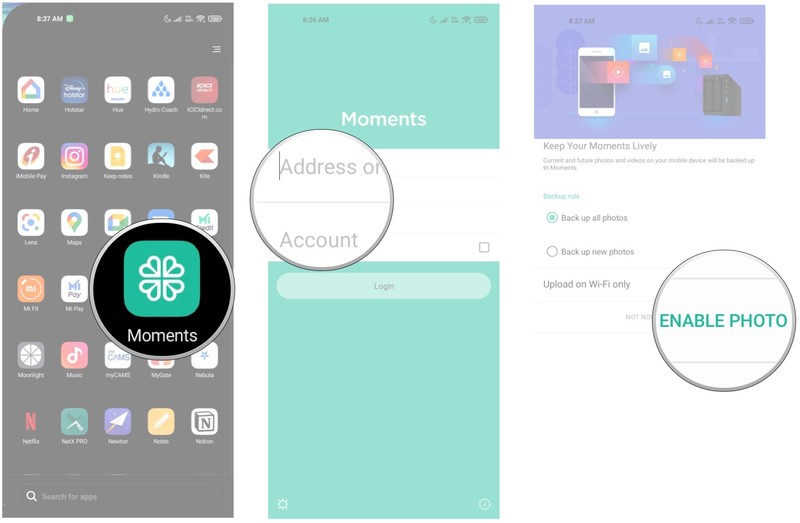
- Open Moments from the app drawer.
- Log in to your NAS by entering its IP address and your user account details.
- Once you log in, you will see an option to back up photos and video. Select Enable photo backup to automatically upload photos and videos. Choose Back up new photos to back up new photos and videos, or select Back up all photos to back up all existing photos and videos on your device.
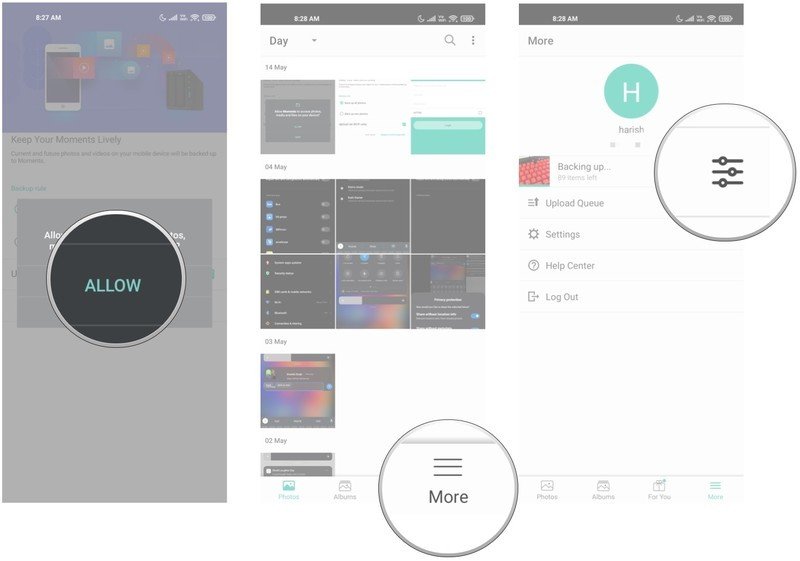
- You'll get a dialog box requesting access to your device's storage. Hit Allow to continue.
- Head to the More tab to configure more options for photo management.
- Select the Options icon to the right of the backup status.
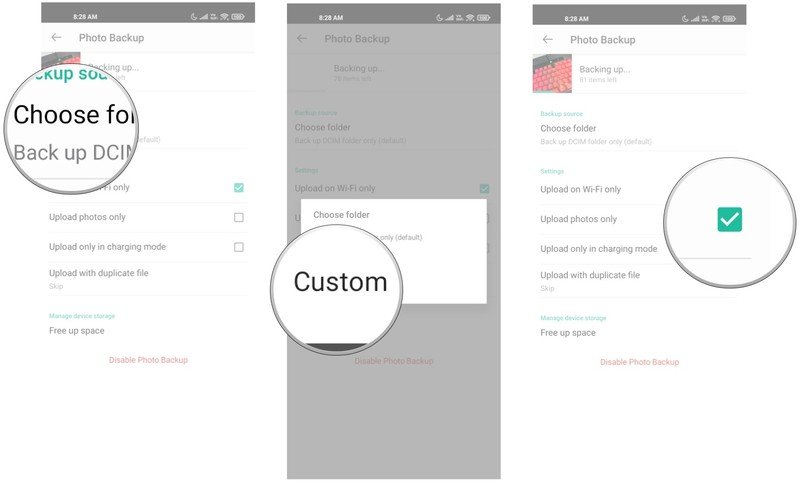
- Hit Choose folder to select what folders to back up. By default, Moments backs up all photos and videos in the DCIM folder.
- You can add folders to back up using the Custom option.
- Finally, if you don't want to upload videos and limit Moments to just back up photos, you can do so by selecting the option in the settings. You can also choose to back up photos and videos only when your phone is charging.
That's all there is to it. Once configured, Moments will automatically back up all new photos and videos, and it's just as seamless as Google Photos. The best part is that all the data is stored offline on your own NAS enclosure, and you can access it from any connected device in your house.
I switch phones once every two weeks, and I turn to Moments to make sure all the photos and videos from the plethora of devices are transferred over to the NAS. Moments is as close to a Google Photos alternative as you can get right now, and the fact that it works entirely offline makes it a standout choice.
So if you are looking to switch away from Google Photos and want an offline solution that's just as feature-rich, it's time to pick up a Synology NAS and install Moments.

Store everything locally
The DiskStation DS220+ makes it easier than ever to store photos and videos from all the phones in your home. The hardware combined with the exhaustive software features gives the NAS a distinct edge in this category, and if you're just starting out with a storage server, you will love what the DS220+ has to offer.

Harish Jonnalagadda is Android Central's Senior Editor overseeing mobile coverage. In his current role, he leads the site's coverage of Chinese phone brands, networking products, and AV gear. He has been testing phones for over a decade, and has extensive experience in mobile hardware and the global semiconductor industry. Contact him on Twitter at @chunkynerd.
