How to use the Finger Scanner on the Galaxy Note 4

Increase security and also speed up the login process in a few key apps
Though the Finger Scanner wasn't as big of a deal at the launch of the Galaxy Note 4 as it was when it debuted on the Galaxy S5, Samsung kept it around hiding within the home button ready to boost your phone's security. The swipe-style scanner may not be as convenient as what's available on some phones, but the way its integrated into the phone to work for your lockscreen, Samsung Account, PayPal and other apps makes it valuable to set up.
The setup process takes some time, as does getting the right feel for how to swipe on it for the best results, but in the end it's a net positive. Read along and let us show you how to get the Finger Scanner up and running.
Getting started with the Finger Scanner

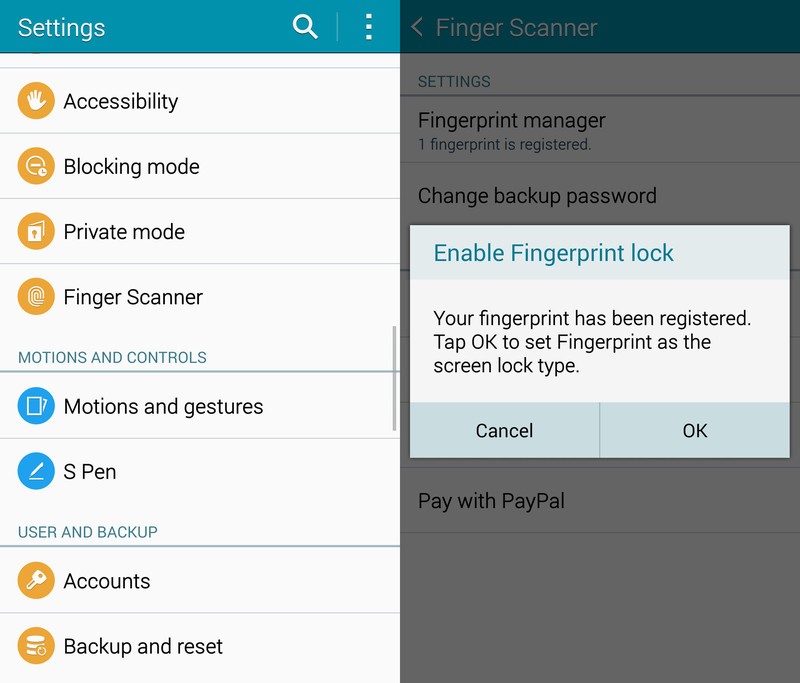
If you didn't set up your phone to recognize your fingerprint when you first set up your phone, chances are you haven't paid much attention to the feature. Head into the Settings, then find the Finger Scanner entry — at the bottom of the "Personalization" section — to get started. This is where you'll be able to control everything related to your Finger Scanner, but you need to set it up first.
Tap the top entry on the page, Fingerprint manager, tap OK on the next screen and then follow the prompts to register your first fingerprint. The on-screen guide will have you swipe any finger of your choice 10 times on the home button to properly map the full print. You can add two more fingerprints later, but at the first go we suggest using the thumb on the hand you most often hold your phone in — that'll make it easiest to swipe and unlock when first powering on your phone.
When first registering your finger, swipe it down across the home button at a variety of angles so that the scanner can read the entire print. Once you've reached 10 swipes, you're almost done. At the next screen you'll be given the option to enhance recognition with 10 more swipes by tapping Register — we advise taking the few seconds to do so.
Final step: You'll now be asked to enter a backup password if for some reason the phone can't recognize your fingerprint. To further increase security Samsung doesn't let you use a simple pattern or PIN for backup, and even imposes a minimum character length of six and requires both numbers and letters. But that's okay, as you won't be using the password often — only in situations where you can't swipe your finger (like when you're wearing gloves, for example). Create your password and you're done with the initial Finger Scanner setup!
Get the latest news from Android Central, your trusted companion in the world of Android
Registering additional fingerprints

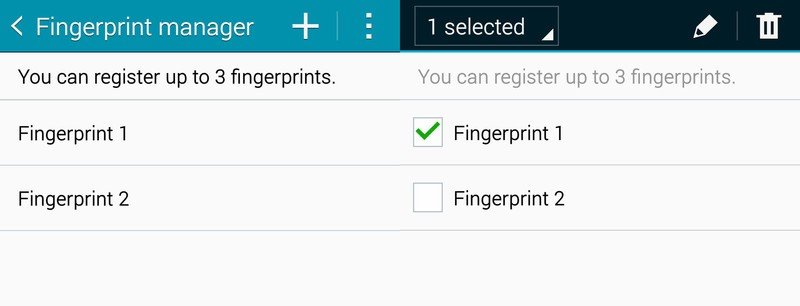
The first fingerprint you scanned was probably the thumb on your dominant hand, but Samsung also lets you train the Note 4 to recognize two additional fingers for cases when you're holding the phone differently. To register additional fingerprints, head back into the Fingerprint manager and press the + at the top to go back through the registration process with a new finger. The most common combination of prints will likely be both thumbs and the index finger on your dominant hand — but of course it's completely up to you which fingers you register.
If for some reason you'd like to de-register one of your prints and choose a different one, head back into the Finger Scanner settings, select Fingerprint manager and long-press on one of the prints. You can then select to edit or delete any or all of the prints if you wish.
Getting the most out of it

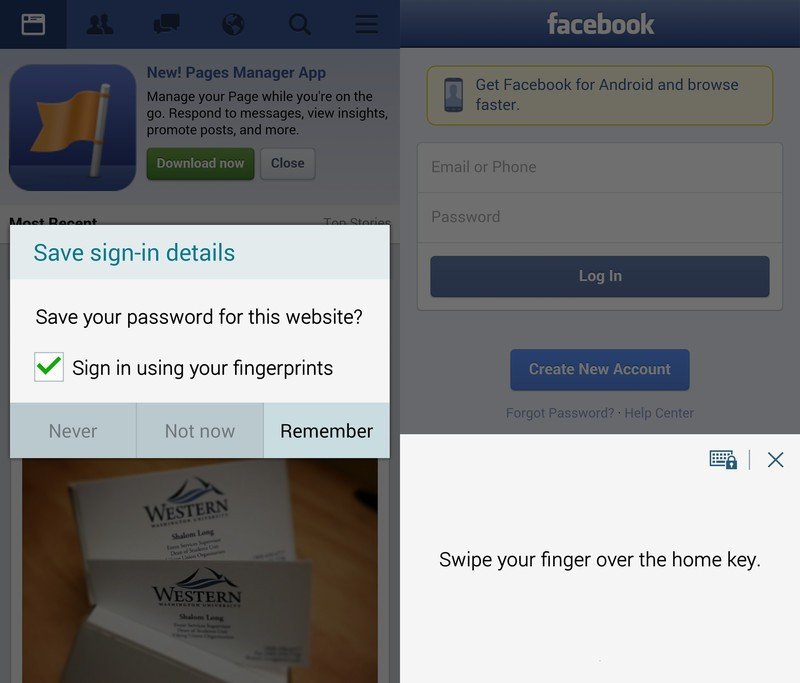
Now that you have your fingerprint(s) scanned into your Note 4, it's time to start making the most of it. Immediately after scanning your first fingerprint the phone will let you use it to unlock your phone when you turn the screen on, but that's not the only way to use this extra layer of security. The Note 4's software also lets you use your fingerprint to sign into supported websites using Samsung's built-in browser, as well as authenticate in the PayPal app and anywhere your Samsung Account would be needed.
All of these options can be found back in the Finger Scanner portion of the phone settings, at the bottom underneath "Features." The setup process is slightly different for each, but you can quickly enable or disable each feature independently.
Once you have your fingers scanned and you get in the habit of using it, we think you'll migrate toward using the Finger Scanner in every app that supports it. Not only is it much more secure than a standard pattern, but it can also save you time when logging into the places you visit most on your phone.
Andrew was an Executive Editor, U.S. at Android Central between 2012 and 2020.

