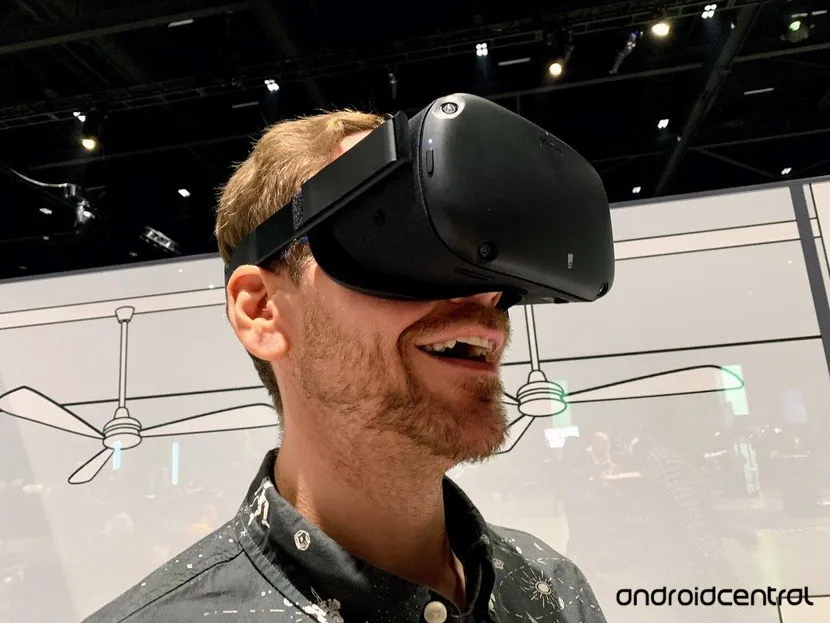
Every VR user wants their headset to seal them in a black vacuum of perfect immersion. Unfortunately, most new headsets, including the Oculus Quest, sport a sizable nose gap that lets light seep in. The nose gap design has several positives. It enables you to check your phone or surroundings without removing your headset, it circulates cold air in to prevent foggy lenses, and accommodates noses of all sizes and shapes. However, you may still want to try sealing the gap. Here are some of the best official and DIY options to remove light bleed from your Quest.
Products used in this guide
- Extra cushion: AMVR VR Facial Interface Set ($36 at Amazon)
- Built-in mask: Esimen VR Face Silicone Mask Pad & Face Cover ($12 at Amazon)
- Light shield secure: Hook and Loop Cinch Strap ($12 at Amazon)
- Reliable adhesion: Gorilla 6065001Double Sided Mounting Tape ($6 at Amazon)
- Sticky, skinny fabric: Caydo Craft Black Adhesive Back Felt Sheets ($9 at Amazon)
Preparing to install
The standard Quest facial interface leaves the bottom gap wide open, but Oculus designed it to be easily removable and replaceable. On online stores like Amazon, you'll find several replacement masks and pads with an attached anti-leakage nose pad. Once purchased, they can be installed in just a couple of minutes.
Before getting started, you have to decide which replacement mask to buy. First, determine if your Quest has a nose guard. These typically appear as two silicone flaps that extend from the padded mask towards one another, ending in a small slit where your nose will poke through. From there, you'll need to decide if you prefer a permanent or removable nose guard.
The AMVR VR Facial Interface Bracket has an optional, attachable anti-leakage nose pad that you can fasten to the interface via plastic pegs. However, the more affordable Esimen VR Face Silicone Mask Pad has the flaps built into the mask itself. Only pick the latter option if you're certain you want the nose gap sealed at all times. Once you've decided, you can go ahead and install it.
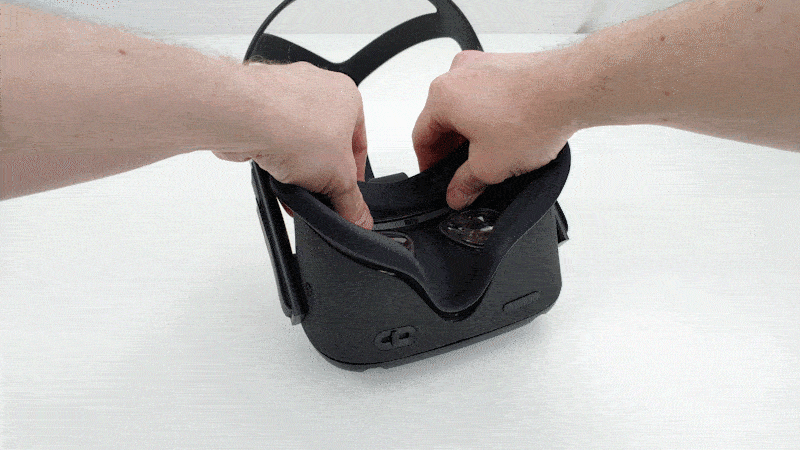
How to remove a facial interface
Before you can install your new interface, you have to remove the original first. This, thankfully, only takes a few small steps.
- Place your Oculus Quest lenses up on a flat surface, away from sunlight.

- Grab the top portion of the facial interface foam and tug gently. It should slide out of the slotted holes easily.
- Then, pull on the foam from the bottom to fully remove it.

How to install a replacement facial interface
If your new product is a replacement facial interface accessory, you can use the following steps to place it in your Oculus Quest.
- Find the notches along the top of the accessory.
- Slot these notches into the holes along the top of the Quest.
- Press the rest of the attachment into the open interface cavity until it is entirely inside the headset.
- Store your original Oculus interface somewhere safe.
How to install an attachable mask or cover
If your new product is an attachable mask or cover, the steps are slightly different.
- Wrap your mask around the facial interface. It should evenly cover the interface on all sides.
- Find the notches along the top of the mask-covered interface.
- Slot these notches into the holes along the top of the Quest.
- Press the rest of the accessory into the open interface cavity until it is entirely inside the headset.
Your rig should now block out almost all light. Keep in mind that many users report that the nose flaps, once pressed tight against your skin, feel uncomfortable and distracting at first. If you use them for a while and can't become comfortable with them, you may want to seek an alternative solution.
How to build a makeshift light blocker

The above solution cuts out light pollution but can lead to a hotter, tighter VR experience. You could also turn the lights off in your room, but this solution necessitates abandoning light-based tracking and switching to inferior 3DoF positional tracking. The best middle ground is to create a light barrier that attaches to your headset but still leaves enough room for air circulation.
To build your own makeshift light blocker, you need to pick up a cinch strap that's at least 2 feet long and 1 inch wide. Additionally, you will need a good adhesive or a needle and thread, soft black fabric, and a pair of scissors.
- Wrap the cinch strap around your Oculus Quest; make sure it can be securely tightened around it.
- Loosen and remove the strap for now.
- Cut out an oval of black fabric. Your oval should spread across the bottom side of your Quest, including the space above the nose gap. In total, it will be about 5-6 inches wide by 4 inches deep.
- Place the fabric oval against the inner side of the cinch strap, on the opposite side as the buckle.
- Using your tool or adhesive of choice (e.g., double-sided tape, Gorilla Glue, or needle and thread), attach the oval of fabric to the strap. It should be centered horizontally and vertically.
- Wrap the cinch strap around your Oculus Quest and tighten it. The buckle should be centered on the top of the headset, and the fabric should be centered above the nose gap on the bottom.
- Using your scissors, cut vertically into the center of the fabric. This will turn the fabric into two "flaps" that will separate when you stick your nose between them.
You should now have a makeshift black mask on the bottom of your headset. It should remain tight no matter how you move it thanks to the cinch, and the loose fabric should provide more breathability and less pressure than a tightly-sealed 3D-printed product would provide.
Your light-busting toolkit
Whether you want to try out a consumer mask or make one of your own, there are plenty of third-party tools at your disposal for solving a light seepage problem that Oculus likely has no intention of "solving" anytime soon.

Say goodbye to light and sweat
Of the silicone anti-sweat products available, this one offers the most features and versatility. It's the only one we found with an easily removable, yet immobile, nose guard. The foam cover blocks out more light on the sides, while the lens cover protects your Quest from sunlight.
With both a thick and thin foam cover and the attachable nose guard, this pack provides enough options that most buyers should find a comfortable configuration, while other, cheaper masks have a one-size-fits-all style. Our one caveat as that glasses wearers report that they had trouble fitting their eyeglasses once AMVR's kit was attached. Yet this is a great option for closing the gap with minimal effort, with the option to open it back up again later.

Straightforward nose coverage
Consumers rate this silicone mask highly for its ergonomic fit, easy cleaning, lightweight, and (most importantly) its effective light blockage. Buy the black version, as users report other colors seeping into their view, and note that some users found the tight nose flaps uncomfortably snug.
For a simple, comfortable silicone mask without any other accessories, you didn't ask for, Esimen offers the most popular and reasonably priced option. Simply slide it onto your existing Oculus equipment, and you'll immediately block out light seepage, while also adding longevity to your headset life by reducing sweat stains and smells.
Additional Equipment
If you buy one of our recommended products above, you won't need any of this additional equipment. However, if you already have a facial pad you like and want to block out the light without taking your Oculus apart, a simple homemade rig using the materials below should suffice. It won't look pretty, but it will be easily removable, leave your lenses unfogged, and get the job done.

Hook and Loop Reusable Cinch Strap ($12 at Amazon)
This velcro strap should be the right length to wrap and tighten around your Quest headset, staying on firmly to help block out light. Plus, you can remove it at any time if you decide to try another light-blocking option.

Gorilla 6065001 Double Sided Mounting Tape ($6 at Amazon)
This industrial-strength adhesive will effectively hold your DIY light blocker together, linking your cinch strap and fabric. Just be careful that you don't tape the Quest, as removing it could damage its paint job.

Caydo Craft Black Adhesive Back Felt Sheets ($9 at Amazon)
You can use any old black fabric, but this thin, water-resistant fabric will last longer without absorbing too much sweat. Plus, its adhesive back will let you attach it to your light-blocking rig without bothering with needles or glue.

