LG G4 camera tips and tricks
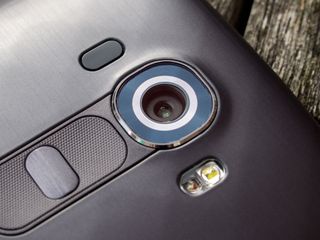
The LG G4 is one of the best Android phones available right now, and the camera experience is a big part of that. LG's latest flagship includes a 16-megapixel sensor with 3-axis OIS (optical image stabilization), a color spectrum sensor and LG's trademark laser-assisted autofocus. And on the software side, the G4 is one of the first mainstream phones to offer RAW photo capabilities out of the box.
That's a great deal of camera technology inside a seriously impressive phone, but what's more important is how you'll use it. Head past the break for a few simple tips to get the most out of the LG G4's main camera.
MORE: How to take great photos with the LG G4
Don't overthink it
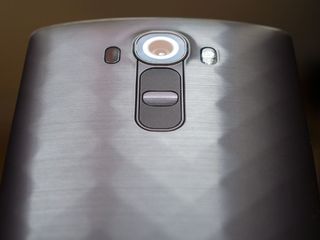
Unlike some other smartphone cameras, there's no arcane trickery involved with getting good-looking pictures out of the G4's main camera — the hardware and software generally takes care of that for you. So don't overthink things — most of the time you'll just be able to shoot from the hip and capture a picture that looks pretty good.
Nevertheless, here are a few basic things to watch out for:
- Graduate from "simple" mode and take more control of your camera's settings. By default the G4's camera app is set up to let you touch the screen to capture photos. We'd recommend living in "auto" mode though, which gives you a few more settings to explore.
- Watch out for green AF indicators that appear after the phone has focused. They're a little tricky to make out, but they'll let you know exactly what the camera's focusing on.
- Tap the screen to focus and set exposure levels based on what you select. To switch back to autofocus and auto-exposure, simply move the camera until it locks onto something else.
- If you're using a microSD card, make sure you're saving your photos there instead of clogging up your phone's internal storage. In auto mode, tap the cog icon and check the icon immediately next to it. An arrow pointing to a phone means photos are saved to phone storage, an arrow pointing to an SD card means you're saving to external storage.
- Take more than one photo. Storage space is cheap, especially if you've loaded your G4 up with a microSD. And the camera's capture speeds are ridiculously fast as well. You might as well take two or three (or more) exposures of each scene, just in case your first one doesn't turn out perfect.
Suggested settings
If you're not inclined to fiddle with settings, the G4's defaults should serve you well. But there are a few settings in "auto" mode that are worth checking out. Here are a few recommendations:
- Turn on guidelines under the Settings (cog) menu. This will help you frame your shots according to the rule of thirds — a guideline that can help to improve your photos' composition.
- Check your resolution and aspect ratio settings. The G4's camera uses a widescreen (16:9) aspect ratio sensor, so leaving this option set to 16:9 will capture as much detail as possible. Alternatively if you prefer the more squarish 4:3 or the Instagram-friendly 1:1, you'll find these options there too — though be aware you're basically just chopping off the sides if you use either of these.
- Like its predecessor, the LG G4 can record 4K (Ultra HD) video, though only for up to five minutes at a time. 4K mode is disabled by default — instead, the G4 shoots at 1080p out of the box. But if you're aware of the trade-offs — that five minute timer, excessively large files, and increased potential for chroma noise in darker scenes — then you'll find it alongside the photo aspect ratio settings.
- Auto HDR is pretty good, so leave it on. This setting detects scenes that require HDR (high dynamic range), which usually means shots covering both very bright and very dark areas.
- Shortcut keys are useful, but Quick Shot isn't. Double-tapping the volume down key when the phone is off is a convenient way to instantly launch into the camera app. But by default the camera also instantly takes a photo when it's launched in this way. Avoid cluttering up your gallery with blurry, poorly-framed images by disabling Quick Shot.
Making the most of macros

The LG G4's f/1.8 lens makes it ideal for capturing macro shots with beautifully defocused backgrounds. And while there's no dedicated macro mode in the camera app, the "auto" and "manual" modes are more than capable of taking impressive close-ups.
Be an expert in 5 minutes
Get the latest news from Android Central, your trusted companion in the world of Android
The G4's laser-assisted autofocus often does a better job of picking out subjects in macro mode than tap-to-focus, so a little patience is advised when focusing on close-up subjects.
If you're still having trouble picking out a very near subject, you might want to switch to "manual" mode and set the manual focus slider down to its lowest level. From there, simply adjust the position of the camera until your subject is in focus.
And finally, shooting macro photos outdoors, particularly with a landscape in the background, can often lead to backgrounds becoming overexposed. Don't forget you can set HDR to "on" instead of "auto" to capture more contrast in the background. Alternatively, shooting in RAW can let you adjust your image after the fact and fix any overexposed areas.
Experimenting with Manual mode
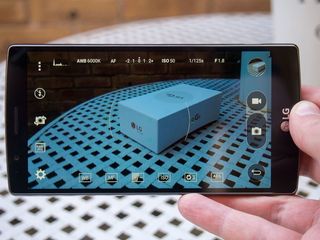
The LG G4's "manual" mode, accessed through the main camera menu (three dots) can seem daunting, but it's actually fairly straightforward.
The row of icons along the top give you the current readings of the various properties you can change down below. And in the top left corner you'll see a histogram, a graphical representation of the light in your picture.
- White balance (WB) controls how yellow or blueish your photo will look. Normally you can leave this set to auto — the G4's color spectrum sensor generally does a great job of detecting the appropriate white balance for just about all scenes. If you do want to tweak this value to your own taste, you'll see the value measured in kelvin displayed onscreen.
- Manual focus (MF) lets you precisely choose the focal point of your scene using an onscreen slider — useful if you want to override the G4's autofocus and focus on a very specific point without worrying about tap-to-focus.
- Exposure value (EV) basically controls how bright the image looks, and you can adjust it from -2.0 up to +2.0, with the default level being zero.
- ISO dictates the sensitivity level used for the shot, while shutter speed (S) controls how long the shutter is open for. When you change either one of these settings, the AE-L (autoexposure lock) button will light up, showing that you're controlling both manually. A lower ISO value gives you clearer-looking images with less grain and noise, but with more light being required to properly brighten images — meaning the shutter needs to stay open for longer. Longer shutter speeds increase the potential for motion blur, which is also bad. So you'll want to balance all of these variables if for get-looking pictures.
- And finally that AE-L toggle we mentioned provides an easy way to switch your ISO and shutter speed settings back to their automatic levels.
The best way to learn with any camera is to play around with the various settings and see what works best for you. There's a lot to get to grips with, and certain features, like light painting using longer exposure times, are best attempted with the help of a tripod.
As good as the G4's auto mode is, manual mode will be overkill for most users. But it also provides one unique capability you won't find on most smartphone cameras: RAW mode. With RAW, you can save photos as DNG (digital negative) files, which you can then process using professional software on your computer. As RAW captures more information than a plain old JPEG, it provides a lot more flexibility when it comes to turning a not-so-great photo into a stunning shot.
MORE: Android and RAW - Everything you need to know
Processing your photos
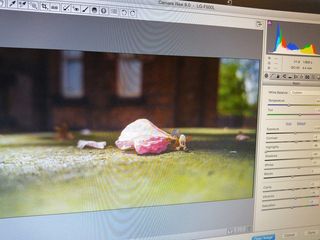
As more experienced photographers will know, taking pictures is just the beginning. Post-processing can turn a good shot into a great one, and rescue an image you might otherwise have ditched. If you're shooting in RAW, you'll want to hook your G4 up to a computer and pull the files off manually, or use an app like Adobe Lightroom (subscription required) to handle this for you. From there, you can tweak and fiddle with sliders to your heart's content.
When it comes to processing good old-fashioned JPEGs, Android also has some decent options to choose from. Our photo editing app of choice is Google's Snapseed, which lets you adjust just about everything — bringing out details in shadows, brightening an underexposed photo or adding more life to a dull shot by increasing its vibrancy. Another good option is Autodesk's Pixlr, which offers similar functionality while introducing more creative tricks into the mix.
And you'll find some basic nondestructive photo-editing capabilities in the Photos app bundled with Google+ if you don't want to get bogged down in sliders.
However you choose to go about taking photos on the LG G4, there's a capable hardware and software suite to back up your photographic efforts. Got any tips of your own? Be sure to share them down in the comments!

Alex was with Android Central for over a decade, producing written and video content for the site, and served as global Executive Editor from 2016 to 2022.
