Hands on and 10-minute install with Nest Cam

Google's connected tech company Nest took a big step forward recently with the addition of the Nest Cam to its lineup. While the announcement itself was more ceremonial than anything else, since Nest had already been selling connected security cameras through Dropcam, a company Nest purchased last year, this new camera is the first product with Nest branded on the front. It's also the first in this connected camera lineup to be fully integrated into the Nest software, thanks to a massive overhaul and re-release of the Nest app.
We've just recently taken the new Nest Cam out of the box, and in under ten minutes had the camera installed and ready to use. Here's what we've learned along the way.


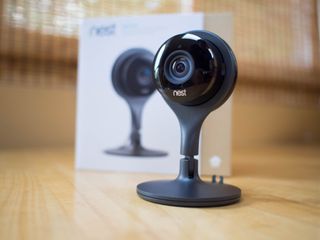
If you've ever used a Dropcam, there's a good chance you won't be terribly surprised by the Nest Cam out of the box experience. The new Nest packaging does little to take away from the iconic shape of the camera, though the updates design does make the base thinner and a little oddly balanced. The weighted base is magnetic, and with the included metal plate you can mount the camera wherever you want, including the side of your fridge should you be so inclined.
Just above the hinge connecting the base to the camera ring is a seam, and twisting against that seam reveals a camera mount threads. A standard camera mount screw fits snugly in this slot, so you can mount the Nest Cam anywhere you can mount a regular camera. Alternatively, the Nest Cam can be popped out of the ring containing this screw, so you can do away with the entire base should you decide a custom mount of some sort is more appropriate.

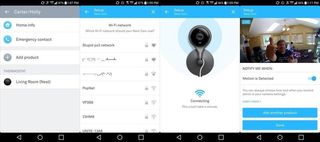
Setting up the Nest Cam could not be easier. Plug one side of the microUSB cable into the camera, the other side into the power brick, and fire up the Nest app. The app walks you through the setup process, starting with scanning the QR code on the back of the camera and asking for login credentials for your Wifi network. Once the network connection is established, the pulsing blue light on the front of the Nest Cam will turn green and you'll hear a chime from the speaker on the camera acknowledging a connection. The Nest app will then show you a picture from the Nest Cam, and from there you can start adjusting camera position and getting to know the features in the Nest app.
There's clearly points to be won here for a stellar out of the box experience, but there's a lot more to this experience than the setup. Nest Cam is still a subscription-based service, and on top of that there's no way to store recordings locally first. There are a lot of questions about how this service works and whether the expense is justified, as well as how well Nest Cam play with the other Works With Nest devices in your average connected home, and we're going to do what we do best and get those questions answered.
Be an expert in 5 minutes
Get the latest news from Android Central, your trusted companion in the world of Android
